Here’s A Delicious German Butter Cake Recipe That Is Easy To Make!
If you’re looking for an easy and authentic Kuchen recipe – that’s “cake” in German – then you should make German butter cake!
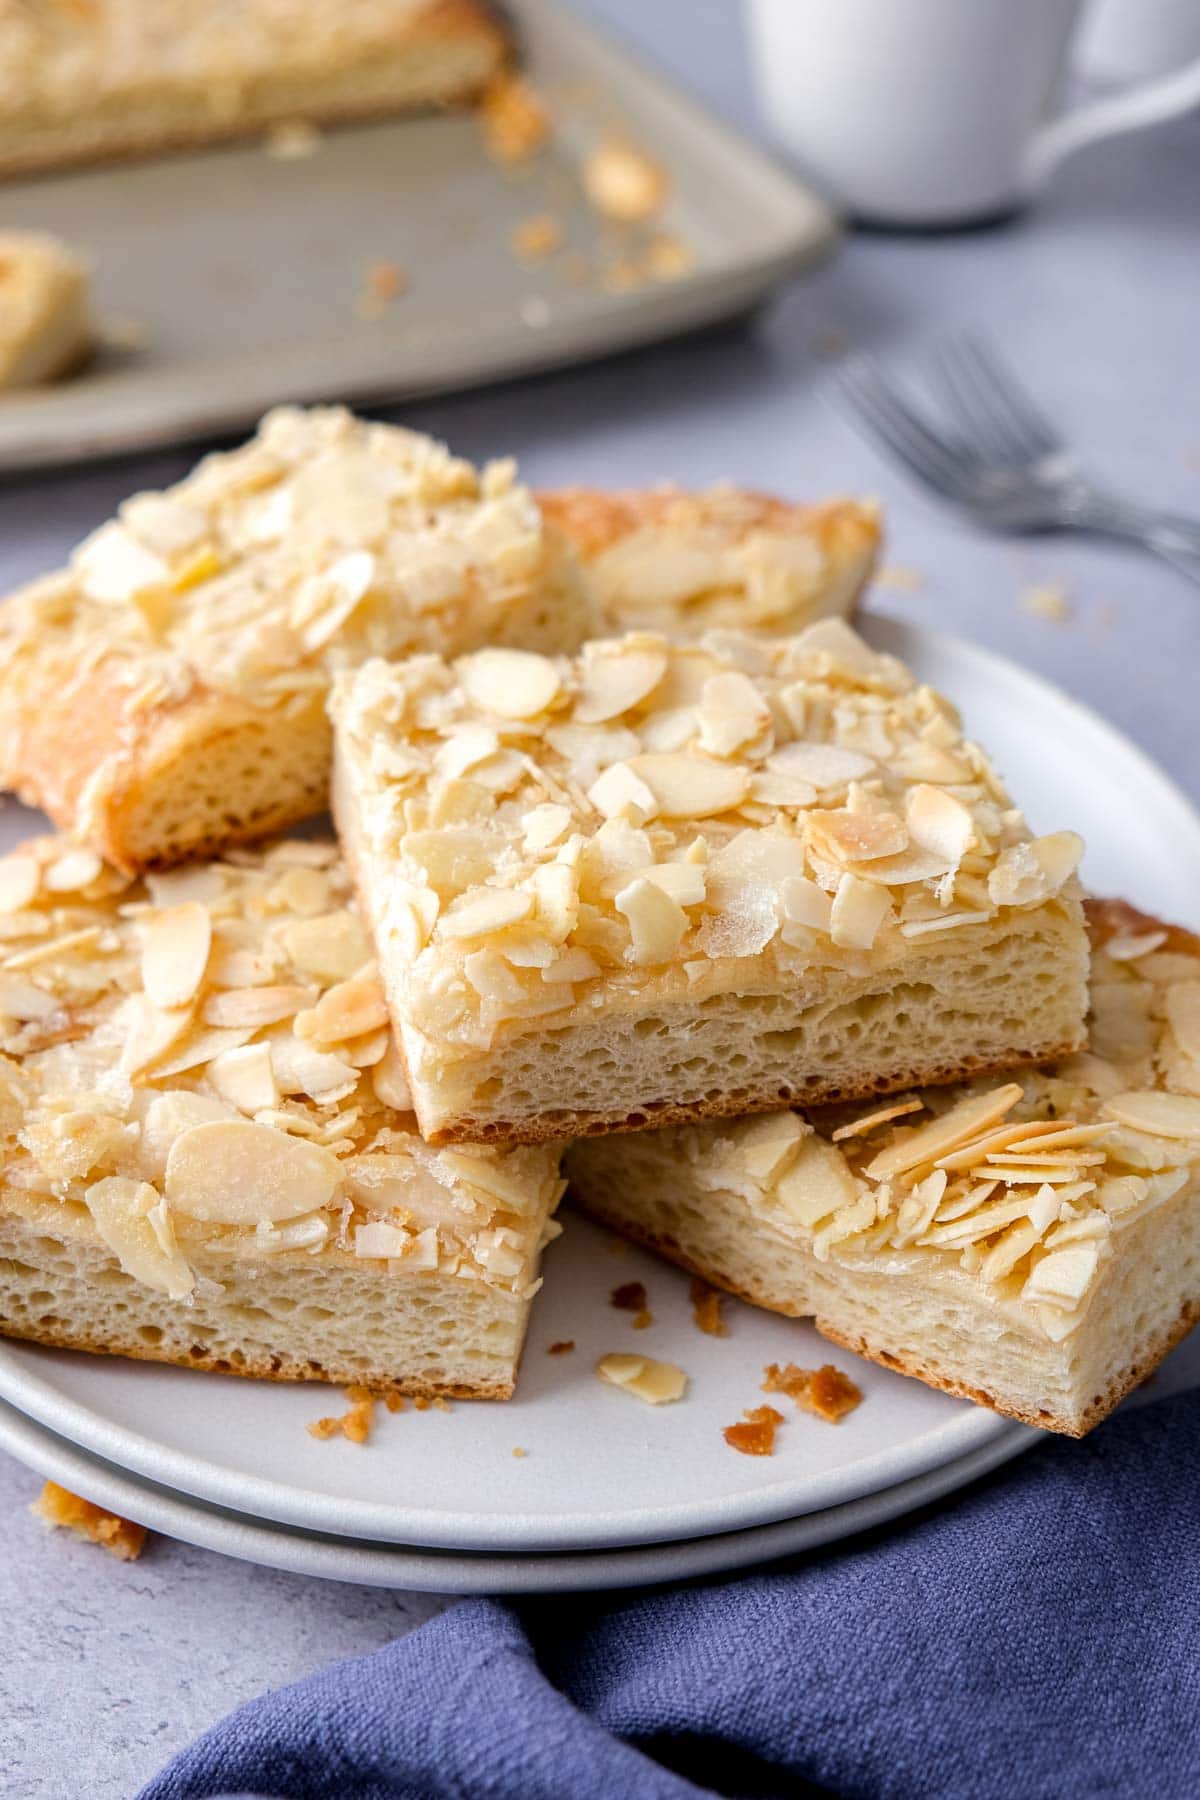
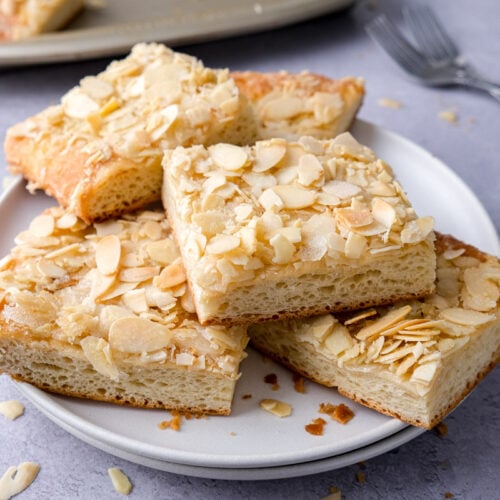
Known in German as Butterkuchen, this authentic German butter cake recipe is made with a simple yeast dough to create that lovely, fluffy texture.
Topped with butter and a layer of sliced almonds and sugar, this Butterkuchen is best served fresh and enjoyed with coffee or tea!
Similar to other German cakes like Streuselkuchen or Pflaumenkuchen, German butter cake is one of those classic sheet cakes.
It is often eaten in the afternoon for “Kaffee und Kuchen” with a hot beverage, especially on weekends. It was often served at Lisa’s Oma’s house after a filling Sunday lunch.
Ingredients
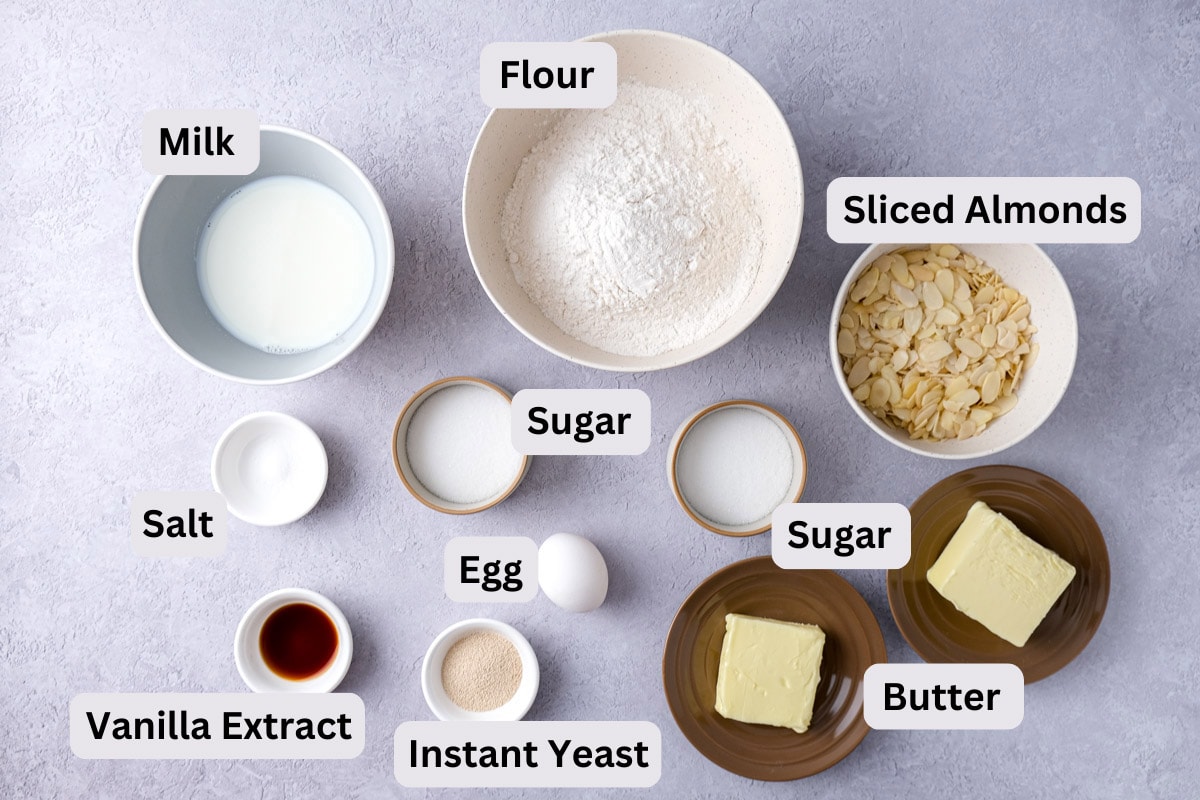
Here are the butter cake ingredients that you will need:
- Milk – The milk should be warm, but not hot. To make the dough.
- All-purpose flour – To make the dough.
- Yeast – We use instant yeast, but active dry yeast will also work.
- Granulated sugar – Some for the dough, and some for the topping.
- Vanilla extract – To add extra flavor to the dough. Alternatively, you can use vanilla sugar.
- Salt – A pinch of salt for the dough.
- Butter – Use good quality unsalted butter for the best flavor, European butter if you can find it. Some softened butter for the dough and cold butter for the topping.
- Egg – One large egg at room temperature for the dough.
- Sliced almonds – For the topping.
Recipe Tips and Substitutions
Before you take on this classic German cake, have a read through these recipe tips to ensure it turns out well:
- Make sure that the yeast you’re using hasn’t expired or it may not rise.
- Don’t let the yeast come in contact with hot liquid, as this may harm the yeast. The milk should be warm, not hot and the egg and butter should be at room temperature.
- Since butter is important in this recipe, use high-quality unsalted butter for the best flavor. If you can find European butter, such as Kerry Gold, you can use that.
- If you’re using active dry yeast instead of instant yeast, dissolve it first in 1/2 cup of the warm milk and 1 tablespoon of the sugar for the dough. Let it sit for 10 to 15 minutes until it starts to foam, then add it to the mixing bowl with the flour. If it doesn’t foam after 15 minutes, the yeast is no longer good.
- Knead the dough long enough, for about 5 minutes, until it is smooth and elastic.
- Adjust the amount of sugar for the topping to taste.
- Since every oven cooks slightly differently, the exact baking time may vary, so keep an eye on the cake toward the end.
- Some people like to pour some whipping cream on top of the baked cake to make it extra moist. If you want to do this, pour about 1/2 cup of whipping cream ( not whipped!) evenly over the hot cake as soon as you remove it from the oven.
How to Make German Butter Cake – Step by Step Instructions
If you’re curious to see what the recipe looks like at each stage, take a look at the butter cake recipe process photos in this section!
This way you can visually follow along as you bake butter cake at home.
If you don’t like visuals, feel free to skip ahead to the printable recipe card with exact measurements and detailed steps at the end of this post.
If you’re using active dry yeast, dissolve it now. Read the recipe tips section above for how to do this.
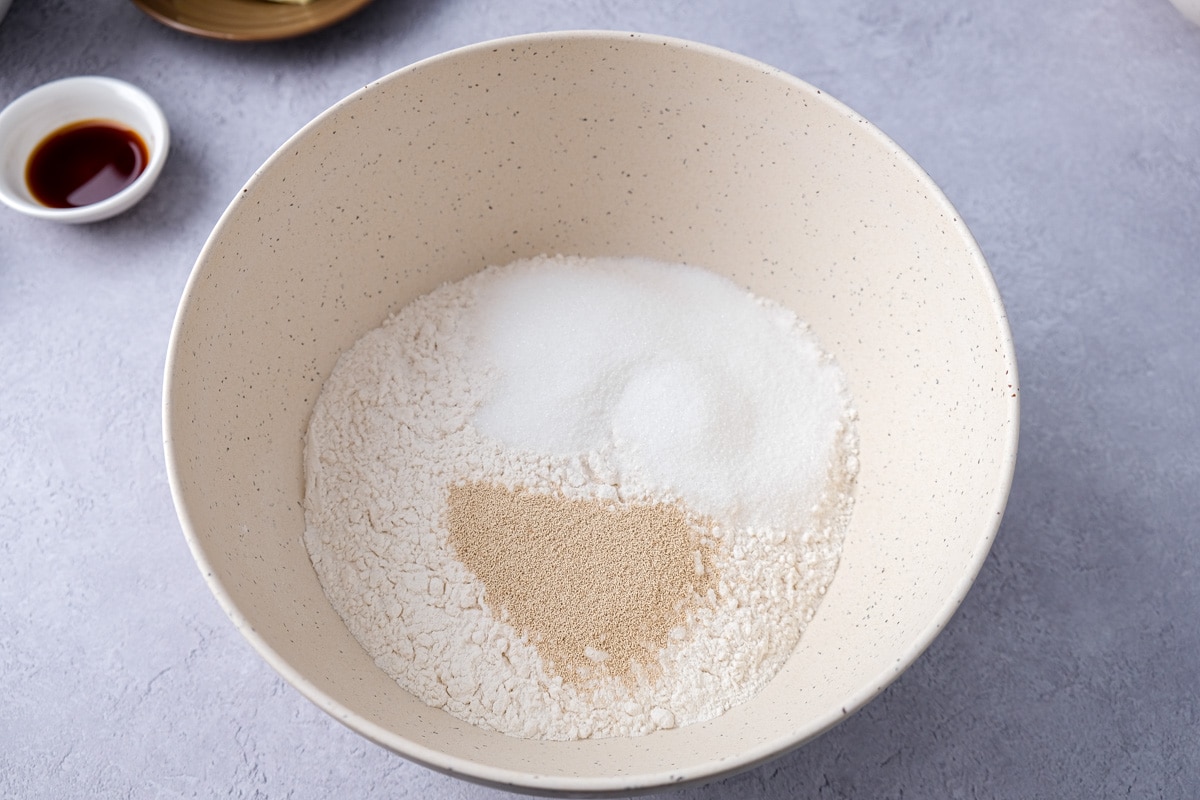
Place the all-purpose flour, instant yeast (if you’re using that), sugar, and salt in a large mixing bowl. Stir to combine.
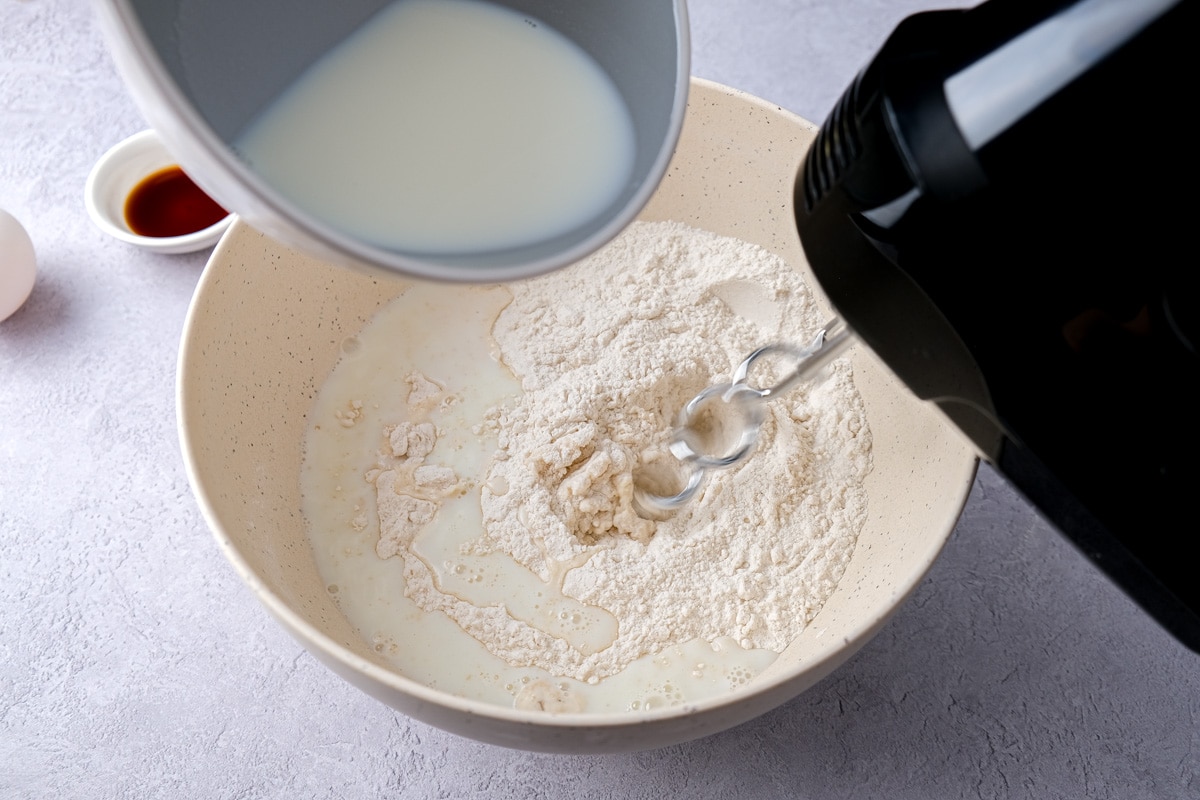
In the next step, pour the warm milk into the bowl and briefly knead the dough using the spiral dough hooks of your electric hand or stand mixer.
If you’re using active dry yeast, then you’ll be adding the yeast with the milk.
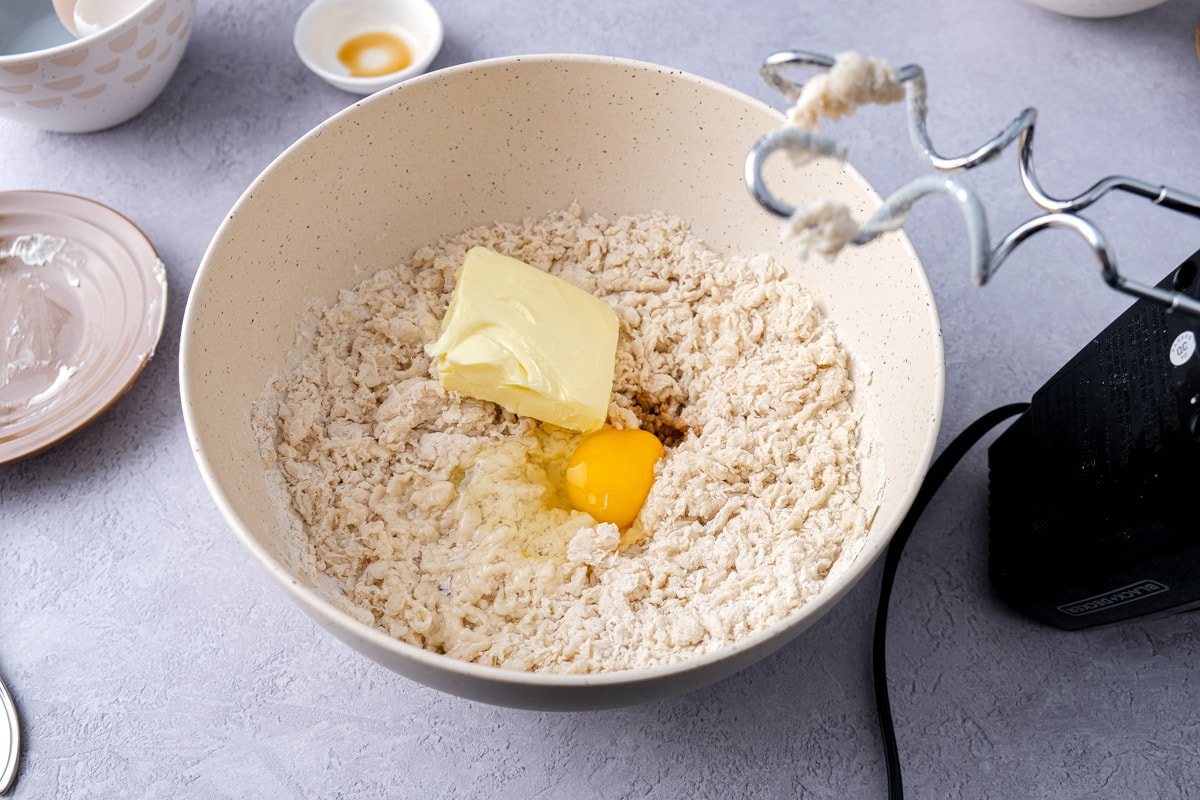
Now add the soft butter – ideally cut up into smaller pieces, egg, and vanilla extract (or vanilla sugar).
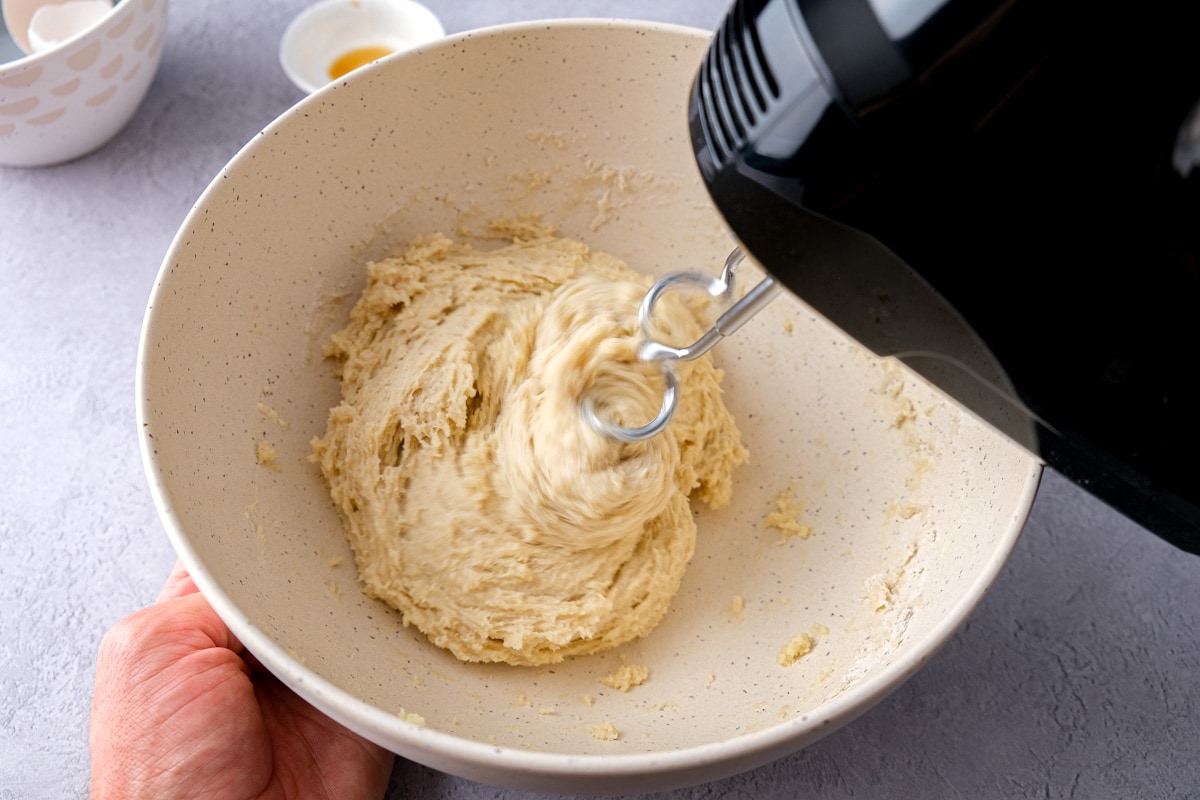
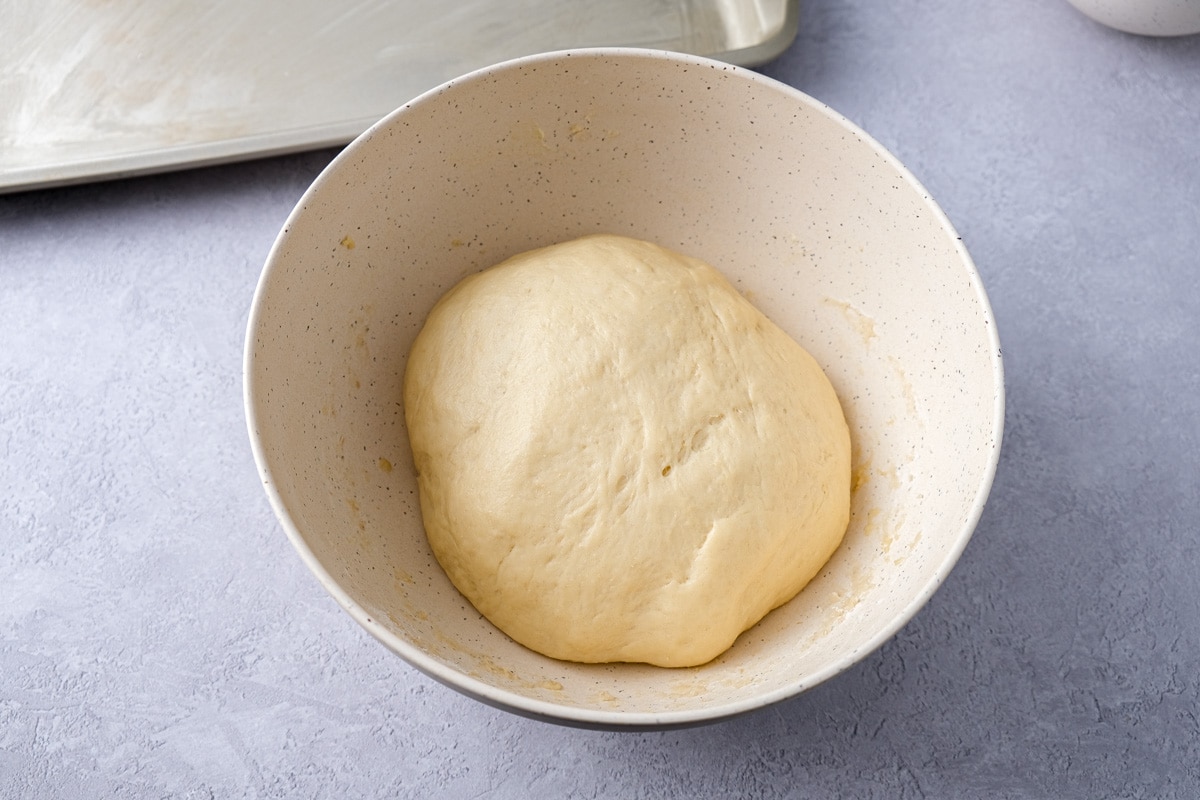
Keep kneading the dough for about 5 minutes until it is soft and elastic and forms a ball that doesn’t stick to the sides of the bowl anymore.
It’s important that you knead the dough really well. Five minutes of kneading may seem like a long time, but it’s worth it.
If the dough is too sticky, add a little bit more flour. In case it is too dry, add a little bit more milk.
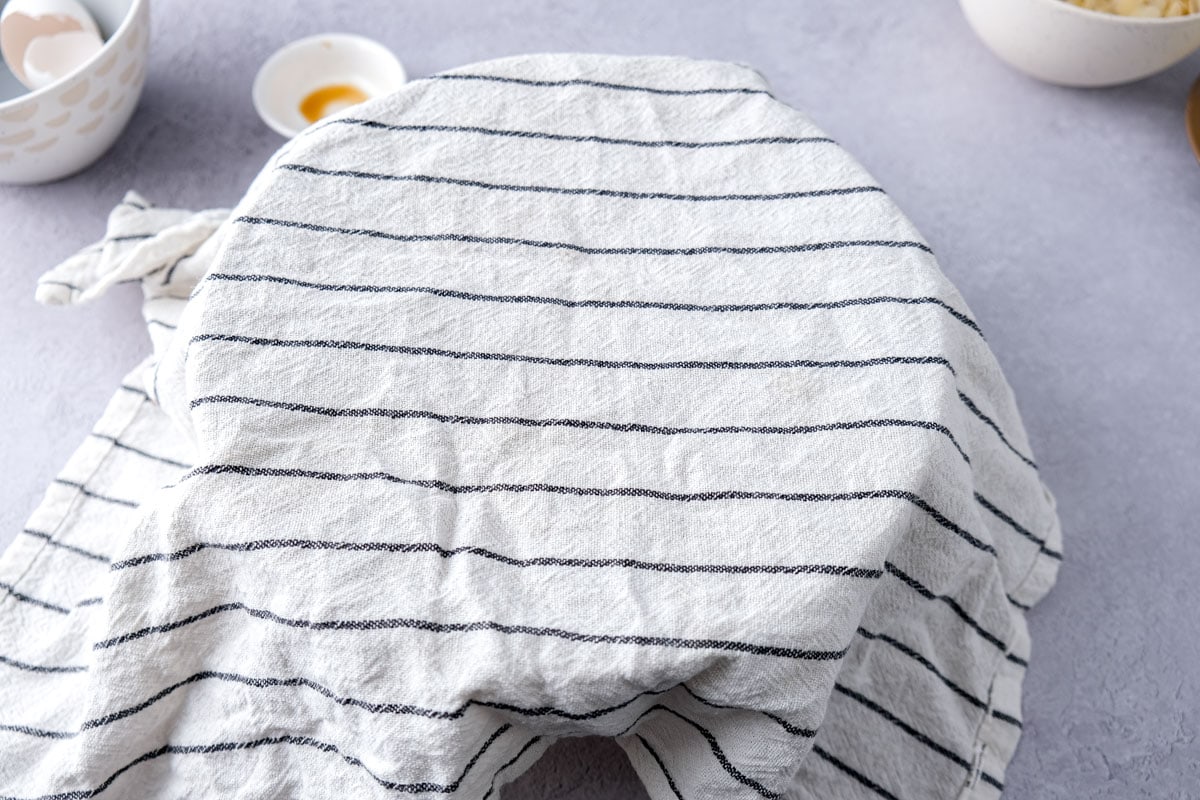
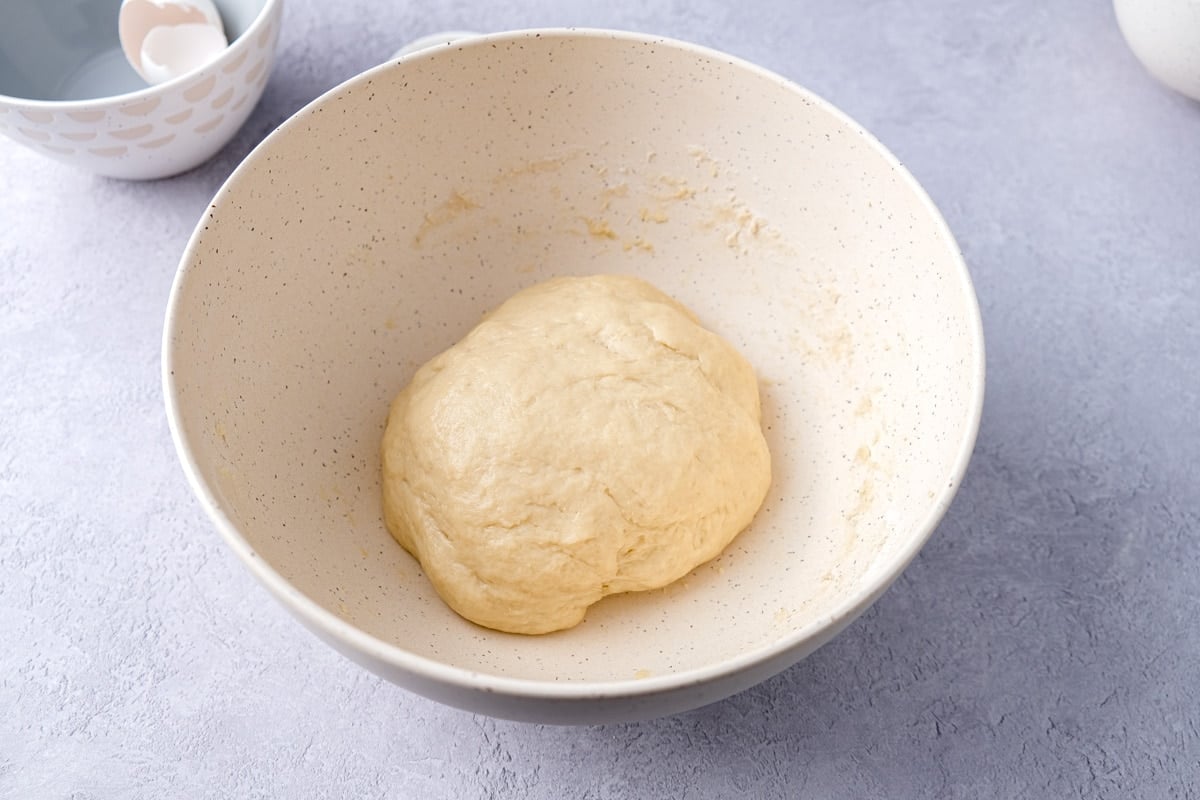
Cover the bowl with a dishtowel or a lid and place it in a warm spot without draft for at least one hour to allow the dough to rise.
If you don’t have a warm place to put the dough, it may take a little for it to rise, so be patient. It should roughly double in size.
When the hour is up and the dough ball has noticeably increased in size, grease a 17×11-inch baking sheet (or slightly smaller).
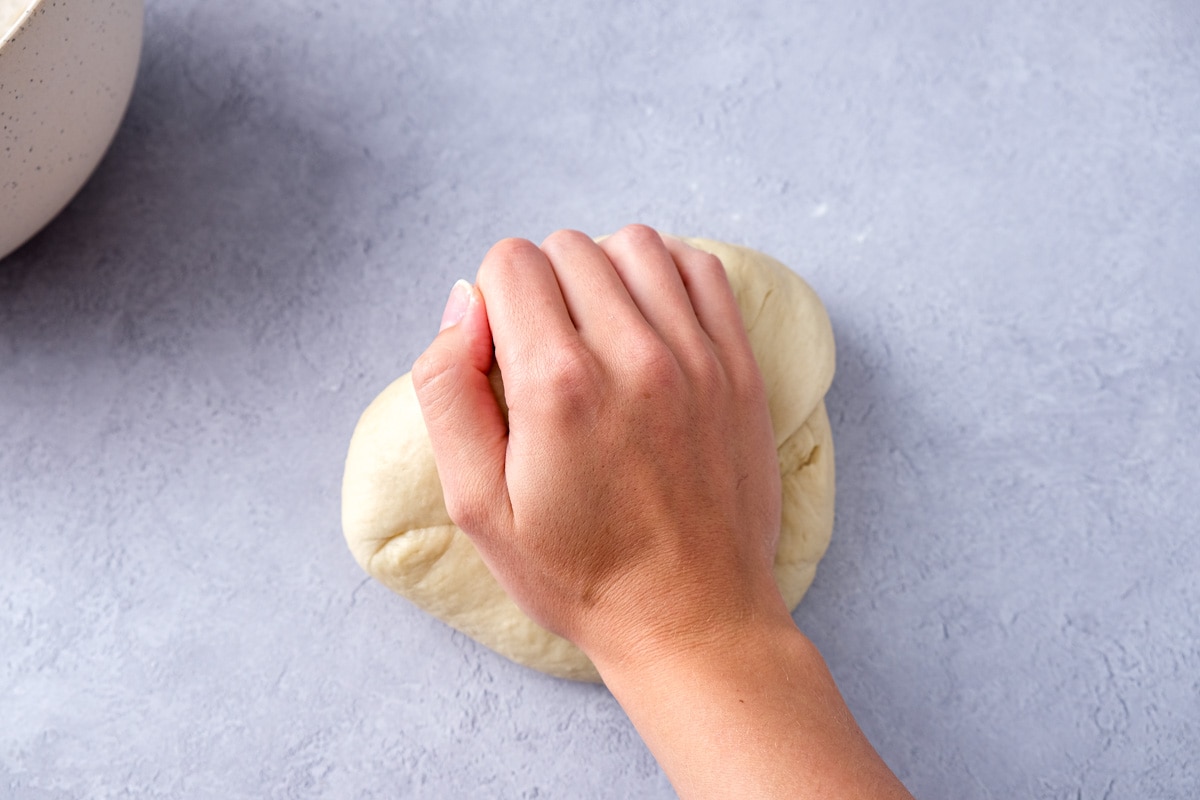
Sprinkle a little bit of flour on the work surface, then briefly knead the ball of dough with your hands.
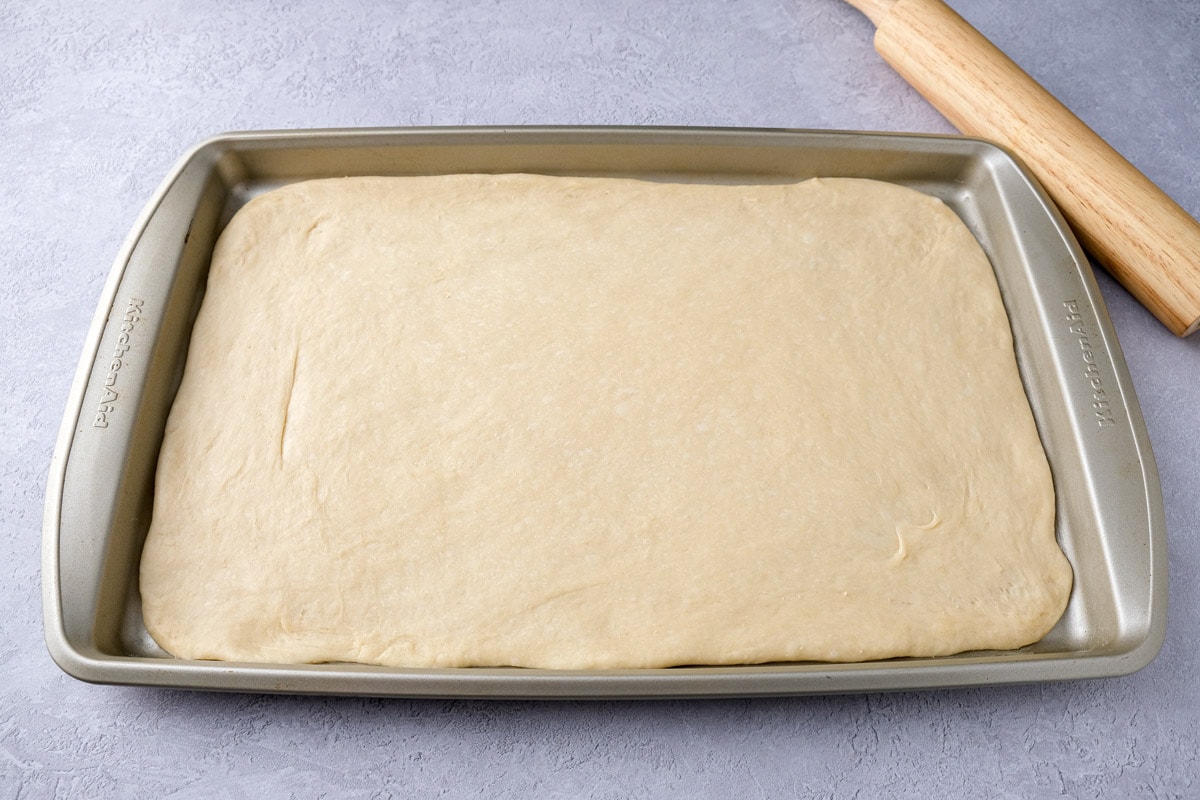
Next, roll out the dough using a rolling pin so it fits your baking sheet and place the dough on the baking sheet.
Cover with a dishtowel and let the dough rise in a warm spot without draft for another 20 to 30 minutes.
When the dough has risen a second time, preheat the oven to 350 degrees Fahrenheit.
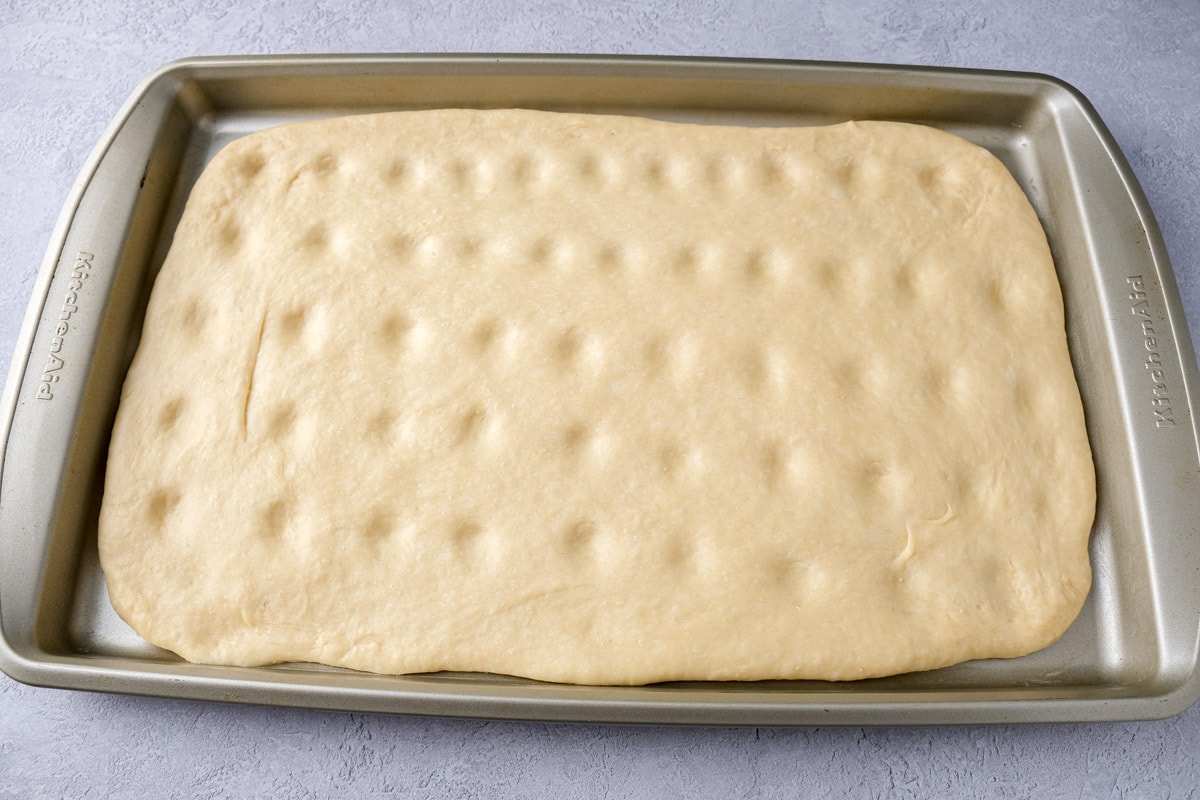
For the topping, take the butter out of the fridge and cut it into very small cubes.
Use your fingers, the handle of a wooden spoon, or the handle of a butter knife to make small, even dents in the top of the dough.
You only want to make dents though, not holes – so don’t poke through to the baking pan!
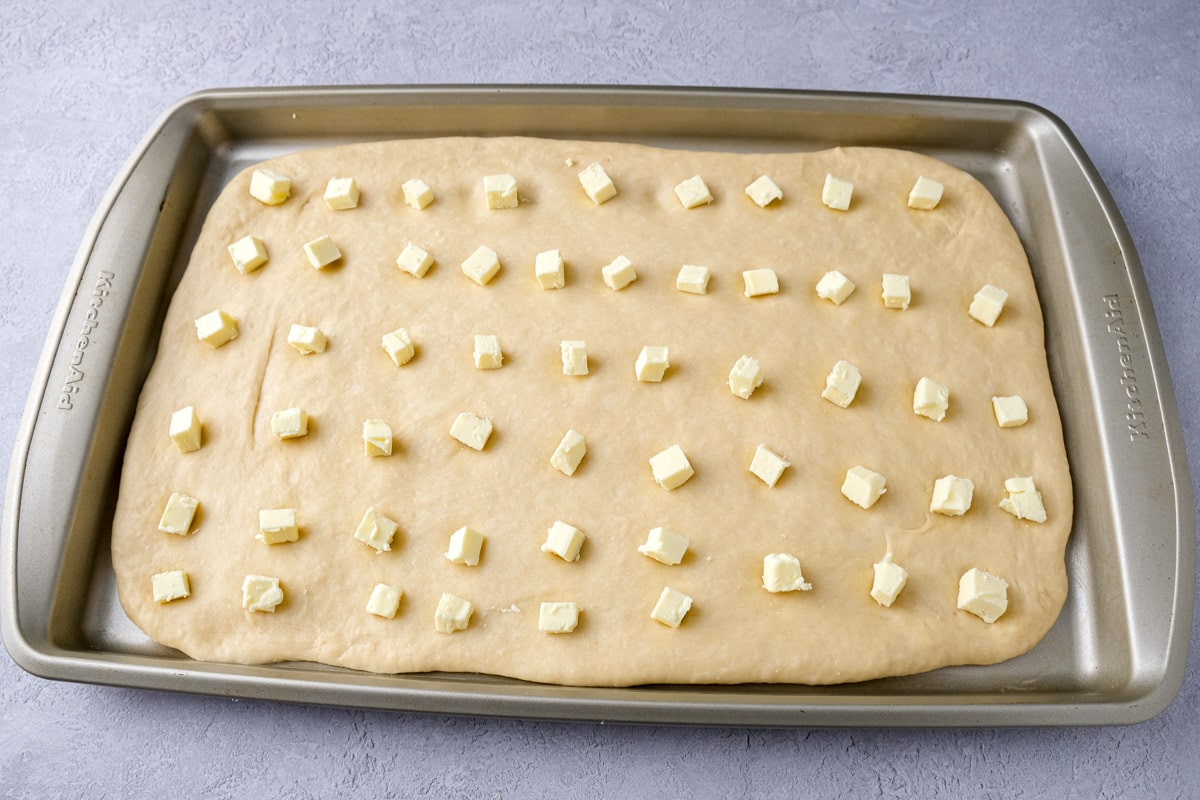
Now place the cold butter pieces into the dents.
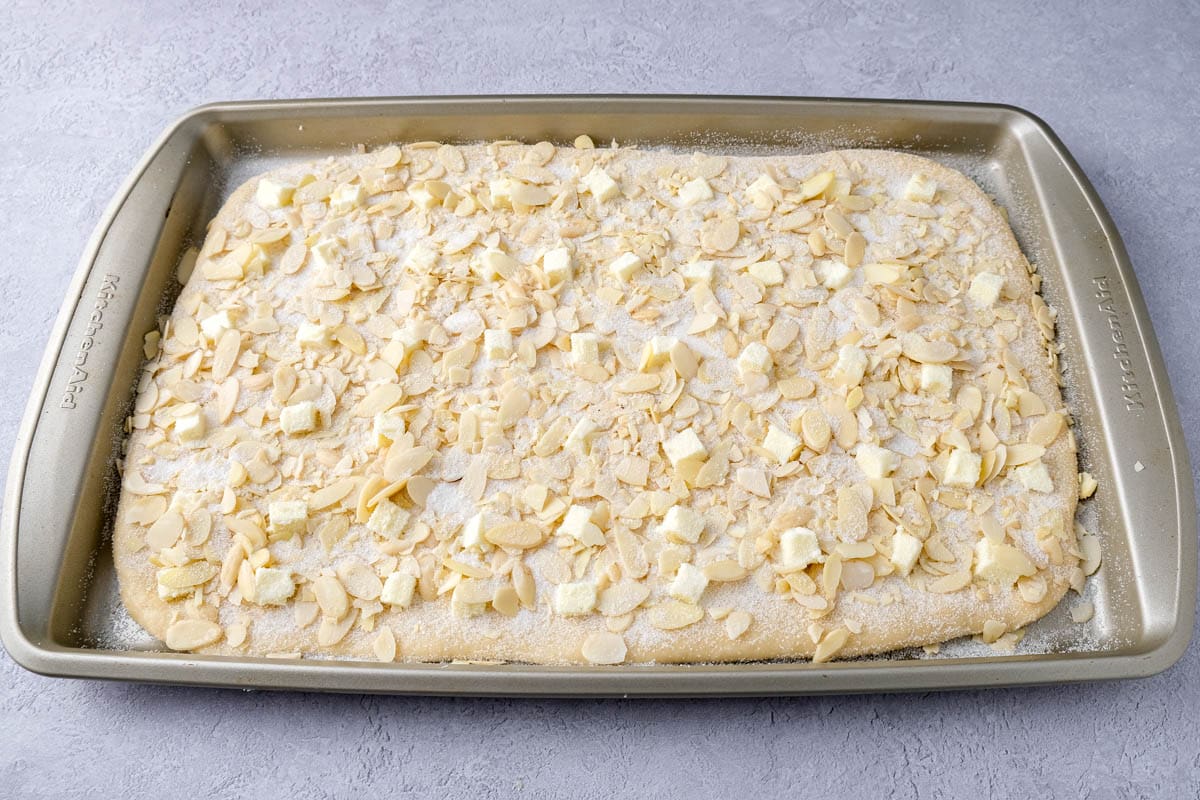
Next, sprinkle most of the granulated sugar evenly over the top of the dough. Then sprinkle the sliced almonds on top and finish with the remaining sugar.
You can add more or less sugar depending on how sweet you like it. When you’re done with this step, the cake is ready to bake.
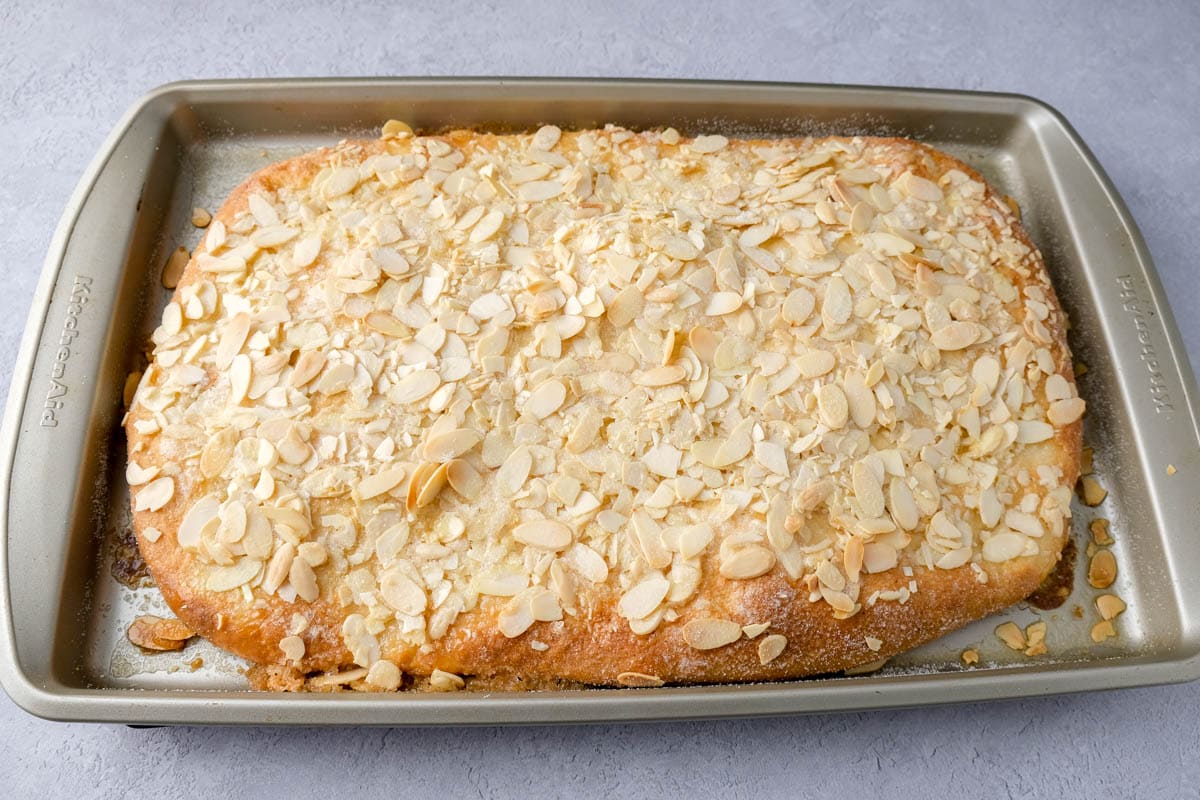
Bake the cake in the oven for about 20-25 minutes, or until the cake is cooked and the edges are lightly golden brown. The almonds should appear lightly toasted, but they may not all be golden brown.
Since every oven is slightly different, the exact baking time can vary.
If you want to make the cake extra moist, you can pour about 1/2 cup of whipping cream (not whipped) on top of the hot cake as soon as it comes out of the oven. We don’t usually do this though.
When the cake is done, let it cool and then serve. It tastes best when it is fresh.
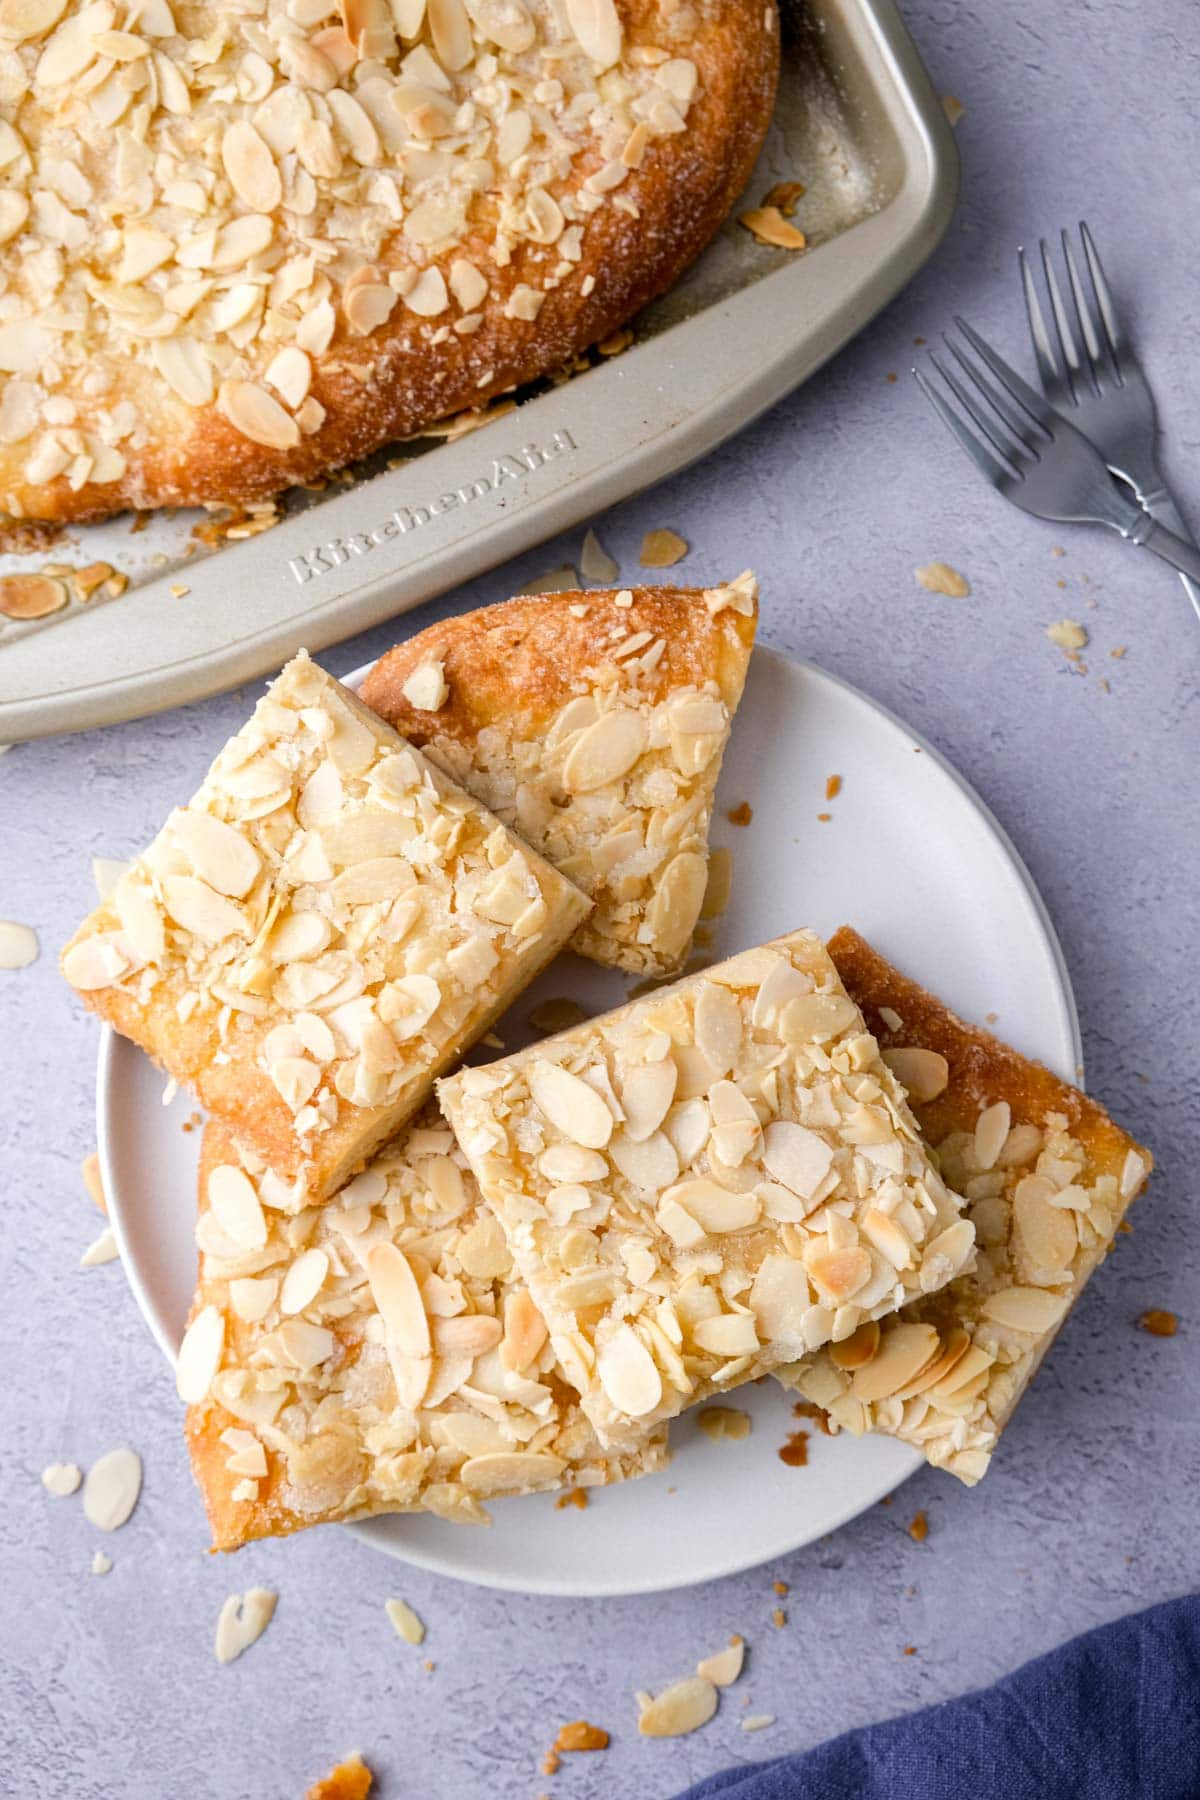
Cut the Butterkuchen into slices and serve it with coffee and or tea for afternoon “Kaffee und Kuchen” or as dessert. Enjoy!
Storage Tips
German butter cake definitely tastes the best when it is fresh. It can dry out quite quickly, so we recommend making it the day you plan to serve it.
You can also make the dough the night before and let it rise in the fridge overnight.
If there are any leftovers, you can store them in a sealed container for a couple of days. You can reheat leftover slices in the microwave for a few seconds to warm them up. If you have a lot of leftovers, it’s best to freeze them.
Butter cake is a cake that freezes really well. Cut it into slices and freeze in small freezer bags or containers. Just make sure that the cake is fully cooled before freezing. You should consume the frozen cake within 3 months.
FAQ
German butter cake – known as Butterkuchen in German – is a classic yeast cake topped with butter, sugar, and sliced almonds.
Butterkuchen is pronounced something like “Buhttah-Cooh-Hen” in German. The word Kuchen – meaning cake – has a “ch” sound that doesn’t really exist in English!
Butterkuchen is very popular for “kaffee and kuchen” so coffee (and/or tea or hot chocolate) goes well with this cake. You can also top it with whipped cream, but it’s not really necessary.
German butter cake is best eaten fresh on the day it is made. It will keep for 1-2 days, but may not taste as good. You can freeze slices of fresh butter cake, which will keep in the freezer for up to 3 months.
Related Recipes
If you liked this butter cake recipe, here are some other classic German cakes that you might want to try:
- Mohnkuchen (German Poppy Seed Cake)
- Pflaumenkuchen (German Plum Cake)
- German Strawberry Cake (Erdbeerkuchen)
- Classic Marble Cake
- Kalter Hund (No-Bake Chocolate Cake)
- Chocolate Zucchini Cake
German Butter Cake (Butterkuchen)
Ingredients
The Dough
- 3 cups all-purpose flour
- 2 1/4 teaspoons instant yeast
- 1/3 cup granulated sugar
- 1/8 teaspoon salt
- 3/4 cup milk, warm
- 1 teaspoon vanilla extract
- 1/3 cup butter, unsalted; softened
- 1 large egg, at room temperature
The Topping
- 1/3 cup butter, cold
- 1/3 cup granulated sugar
- 1 1/2 cup sliced almonds
Instructions
- Add the flour, yeast, sugar, and salt to a large mixing bowl. Stir well.3 cups all-purpose flour, 2 1/4 teaspoons instant yeast, 1/3 cup granulated sugar, 1/8 teaspoon salt
- Add the warm milk and knead briefly using the spiral dough hooks of your electric hand or stand mixer.3/4 cup milk
- Add the soft butter, egg, and vanilla extract. Continue to knead the dough until it is soft and elastic, about 5 minutes. It should form a ball and no longer stick to the sides of the bowl. If the dough is too sticky, add a little bit more flour. If it is too crumbly, add some more milk.1 teaspoon vanilla extract, 1/3 cup butter, 1 large egg
- Cover the bowl with a dishtowel or a lid and let the dough rise in a warm and draft-free place for about an hour, or until it has roughly doubled in size.
- Lightly grease a 17×11-inch baking sheet (a slightly smaller one will work as well).
- Once the hour is up, sprinkle a little bit of flour on your work surface. Briefly knead the ball of dough with your hands, then roll it out to fit your baking sheet with a rolling pin.
- Transfer the dough to the baking sheet. Cover the baking sheet with a dishtowel and let the dough rise in a warm spot without draft for another 20 to 30 minutes.
- Preheat the oven to 350 degrees Fahrenheit.
- For the topping, cut the cold butter into small cubes and use your fingers or the handle of a wooden spoon or butter knife to make small, even indentations in the top of the dough (don't poke through to the bottom of the pan).1/3 cup butter
- Place the pieces of cold butter into the dents and sprinkle most of the granulated sugar evenly over the top. Then sprinkle the sliced almonds on top, and finish with the remaining sugar.1/3 cup granulated sugar, 1 1/2 cup sliced almonds
- Bake the cake on the middle rack of your oven at 350 degrees Fahrenheit for 20 to 25 minutes, or until the cake is cooked, the edges are lightly golden and the almonds on top are slightly toasted. Since every oven is different, the exact baking time may vary slightly.
- Remove the cake from the oven and allow it to cool. Cut it into slices before serving. Enjoy!
Notes
- Make sure that the yeast you’re using hasn’t expired or the dough may not rise.
- It is important that the milk is warm, not hot, and the egg and butter are at room temperature when they come in contact with the yeast.
- Use good quality unsalted butter for the best flavor.
- Knead the dough long enough, for about 5 minutes, until it is smooth and elastic. This may seem like a long time, but it’s worth it.
- If you’re using a different size baking sheet, you may need slightly more or less butter, sugar, and sliced almonds for the topping.
- Optional: Pour about 1/2 cup of whipping cream (not whipped!) on top of the hot cake as soon as you take it out of the oven to make it extra moist.
- Butter cake tastes best when fresh, so we recommend making it the day you plan to serve it.
Nutrition
This nutritional information has been estimated by an online nutrition calculator. It should only be seen as a rough calculation and not a replacement for professional dietary advice.
This recipe was first published in July 2020 and updated in November 2023.

Can this be frozen?
Yes, it can be! In fact, I recommend freezing leftover butter cake if you don’t plan to eat it the next day. I like to cut the cake into slices first before freezing it – that way I can easily take a few slices out of the freezer and let them thaw on the countertop. /Lisa
I am second gen and my family owned a bakery in Philadelphia, but our neighbors who also were German and owned our town bakery made Butterkuchen. It was such a treat, but like other recipes 100 and, it had a buttery topping not real sweet like the American Chefs Butter Cakes that have a lot of sugar and butter. So it must be a regional thing, but I love having the topping, it kind of like having a nice whip on a dessert or sauce over a good prepared meal. Just a little extra without being too sweet, the cake seems to be the same. The baked almonds is always wonderful to any desert. Great recipe. Thank you for reminding me of a special treat!
Thank you for leaving a comment, Joan!
In northern Germany this is usually called Zuckerkuchen, and the dough was taken to the bakery in the village and they spread it on a big baking sheet, then the dough owner would put on the topping. It was baked at the bakery and one would pick up the finished product in the afternoon and carry it home on a big wooden tray. Always tasted so good. It could also be topped with Streusel and in the fall with Italien prunes.
Thanks for sharing that, Wilma!