

Here’s A Simple Pirozhki Recipe For Some Flavorful Hand Pies!
If you’re craving something hot, fried (or baked), and full of tasty goodness, Russian pirozhki – sometimes also spelled piroshki or pirojki – should be on your list of recipes to try.
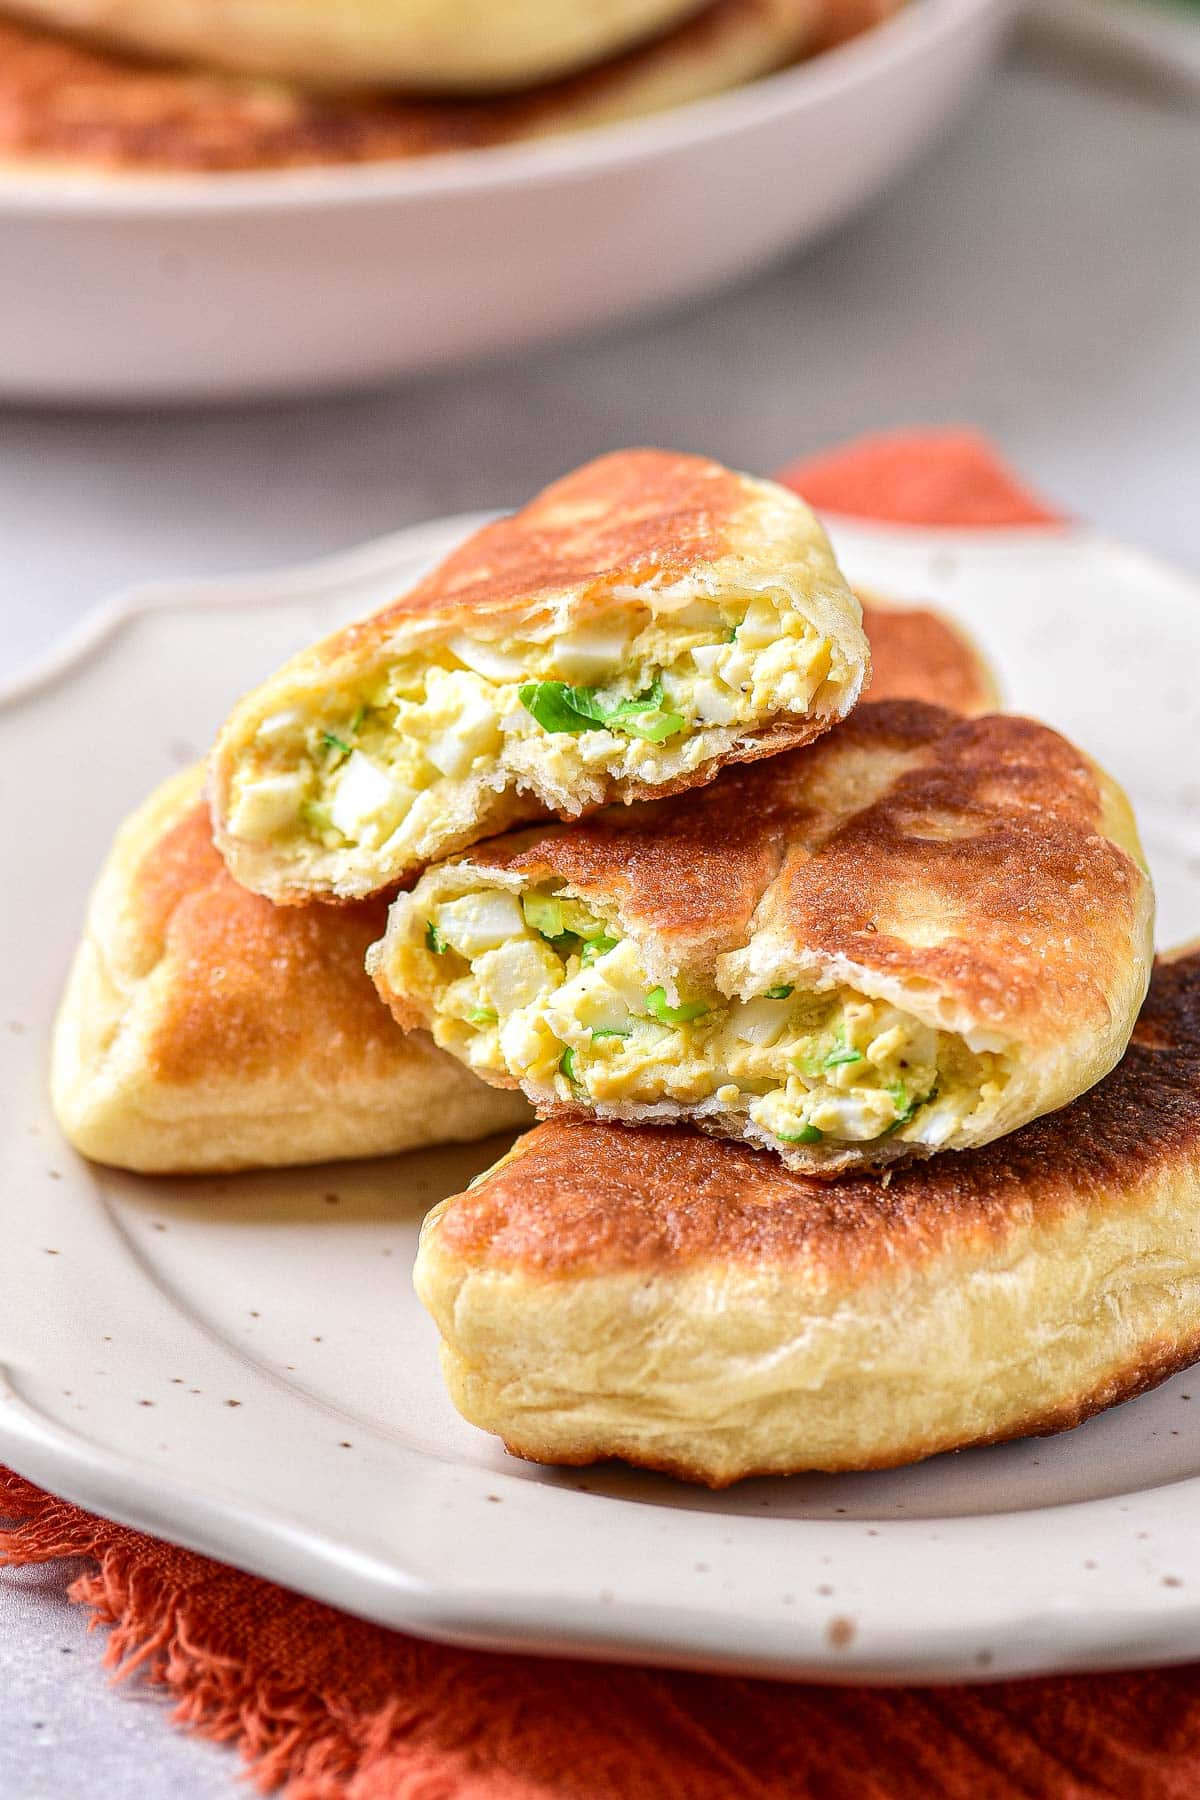
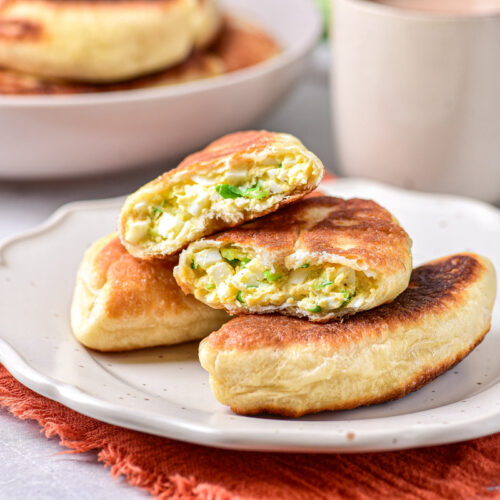
Pirozhki are stuffed buns made from a simple leavened dough that can be filled with savory or sweet ingredients, such as meat, boiled egg with scallions, cheese, cabbage, or jam.
In Russia and many Eastern European countries, they are a popular street food and/or comfort food. In the US, a popular descendant of the pirozhki (brought over by Volga Germans) is known as bierock or runza (depending on the region).
In this recipe, we’ll show you how to make pirozhki with an egg and scallion filling as well as a mashed potato filling, but feel free to experiment with other fillings!
Ingredients
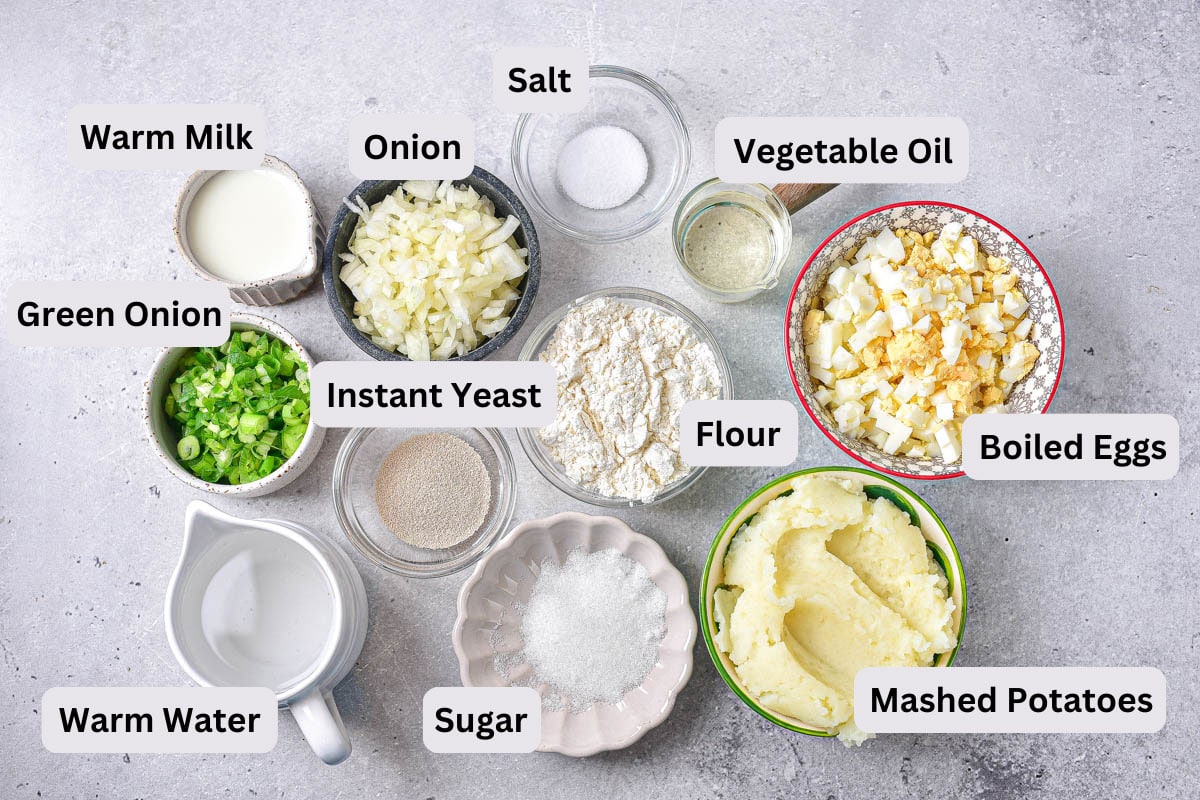
Here are the pirozhki ingredients that you will need for this recipe. As mentioned, you can also experiment with other fillings.
- All-purpose flour – To make the dough.
- Instant yeast – To make the dough; make sure the yeast hasn’t expired.
- Granulated Sugar – For the dough.
- Milk – Warm milk for the dough; both low-fat and whole milk will work.
- Water – Warm water for the dough.
- Salt – Some for the dough and some to season the filling.
- Vegetable oil – Some for the dough and some to fry the onions and pirozhki.
- Eggs – Hard-boiled eggs, peeled and finely chopped for the egg filling.
- Green onion – Adds extra flavor to the egg filling. You can use only the green part for a milder flavor.
- Sour Cream or Mayonnaise – Optional addition to make the egg and green onion filling a little creamier.
- Mashed potatoes – For the mashed potato filling. You can make mashed potatoes with russet or Yukon Gold potatoes.
- Onion – One chopped yellow onion to add extra flavor to the mashed potato pirozhki.
- Black Pepper – Optional; to season the filling.
Recipe Tips and Substitutions
Before you make this recipe for pirozhki, have a read through these recipe tips and substitutions so that the pirozhki dough and filling will turn out well!
- Be careful not to use too much flour, otherwise, the dough might become too dense and the pies will be hard, especially when they cool down. Measure your flour correctly by using the spoon and sweep method.
- Since you are working with yeast, it’s important that the milk and water are warm, but not hot. This could harm the yeast.
- You can fill the pies with different fillings, such as stewed cabbage, ground meat, rice and mushrooms, or with sweet fillings like jam, apples, cottage cheese, cherries, or strawberries.
- Seal the pirozhki well to prevent the filling from leaking during cooking. If pinching the dough is not enough, you can use some beaten egg or milk to seal the edges.
- You can also bake the pies in the oven at 360 degrees Fahrenheit for 20-25 minutes instead of frying them. This will make them less greasy. To help them brown, brush them with beaten egg before putting them in the oven.
- For the best pies, make sure to roll out the dough thinly before adding the filling.
- The exact cooking or baking time may vary depending on the filling and the size of the pirozhki.
How to Make Pirozhki – Step by Step Instructions
In this section, we’ll visually show you how to make pirozhki. We’ve included recipe process photos so you can follow along at home and track your progress.
If you are wondering how to fold piroshki, this section is also for you, because you will see a photo showing exactly how that step is done.
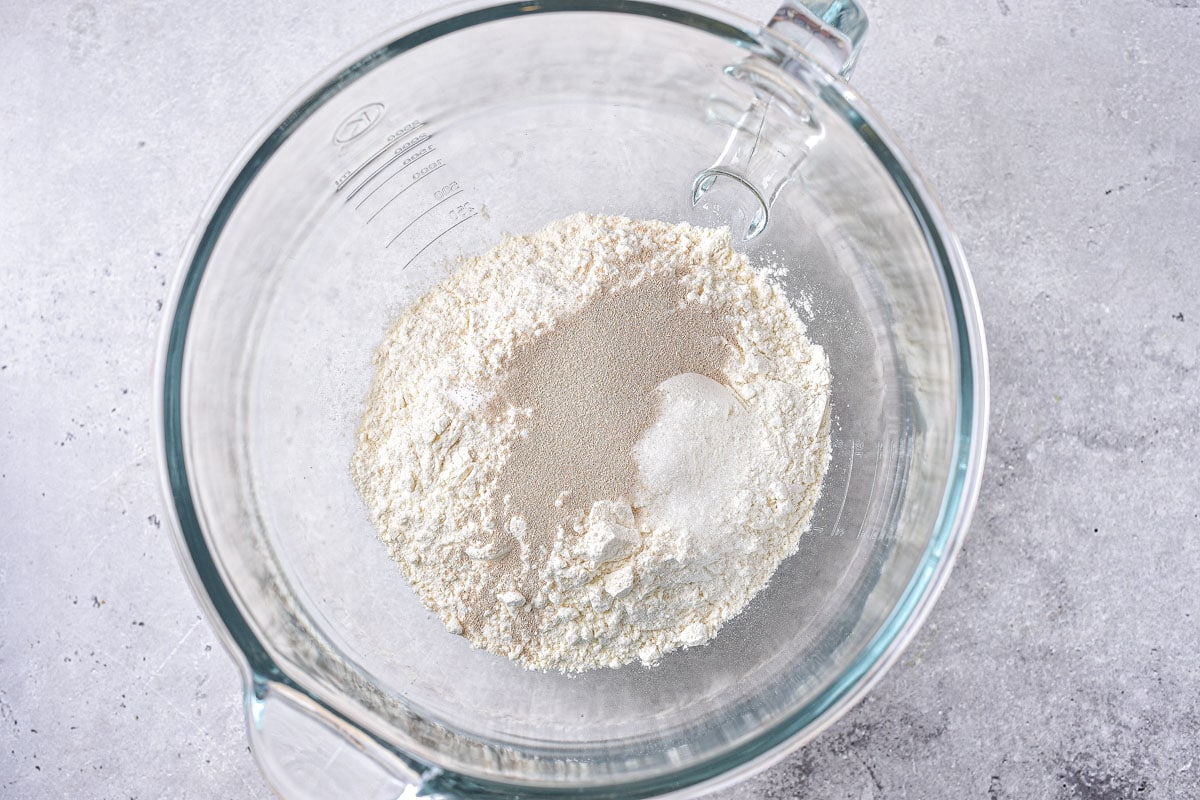
First, combine the flour, yeast, sugar, and salt in a large bowl.
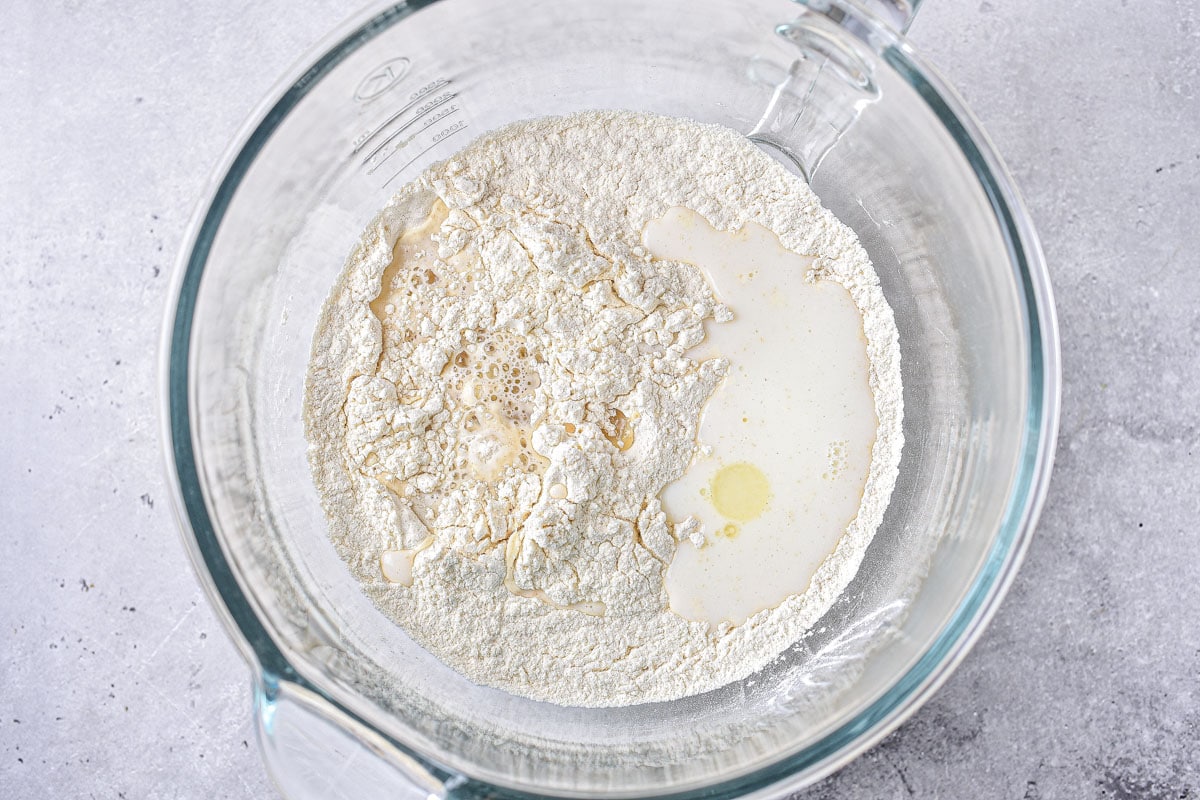
Next, add the warm milk and warm water, and 3 tablespoons of vegetable oil.
It’s important that the milk and the water are warm, but not hot, as this could harm the yeast.
Mix well with your hands or a mixer with the spiral dough hooks until a soft and slightly sticky dough forms.
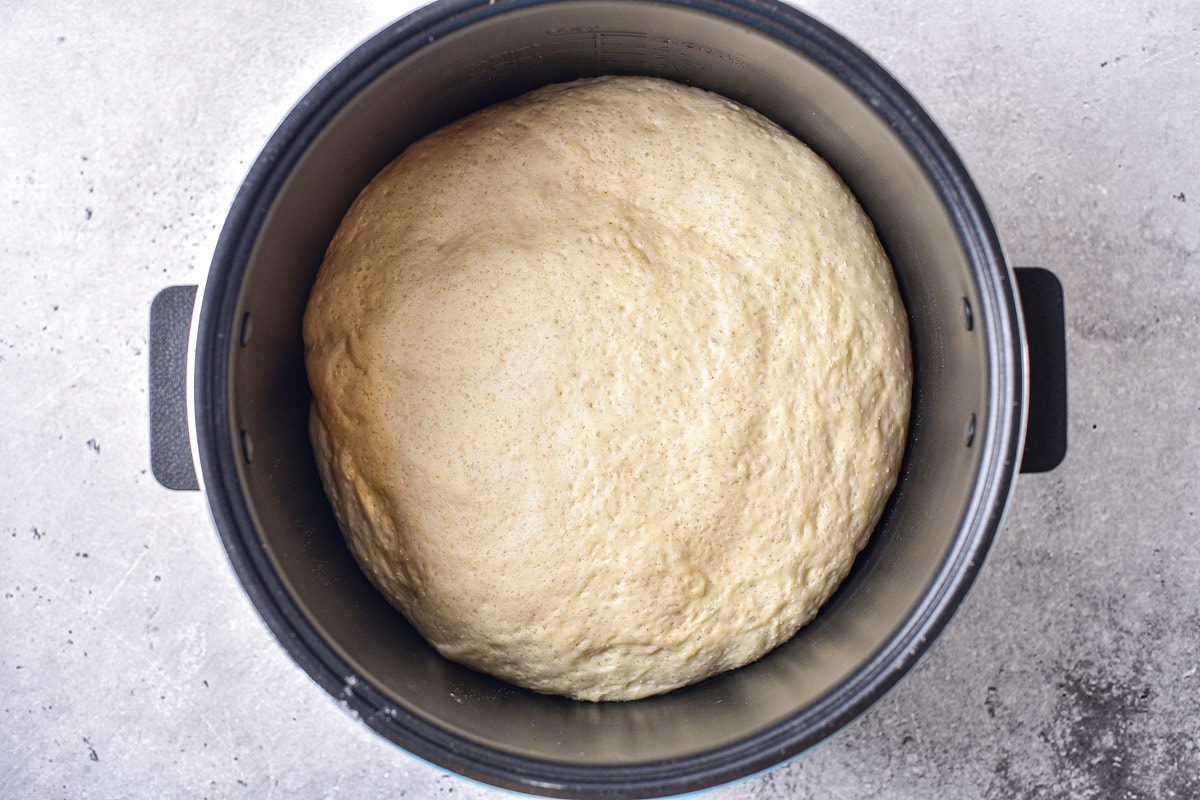
Cover the bowl with plastic wrap and let the dough rise in a warm place for about an hour, or until doubled in size.
Alternatively, you can transfer the dough to a bread maker or multicooker and set it to bread-rising mode for 30-40 minutes.
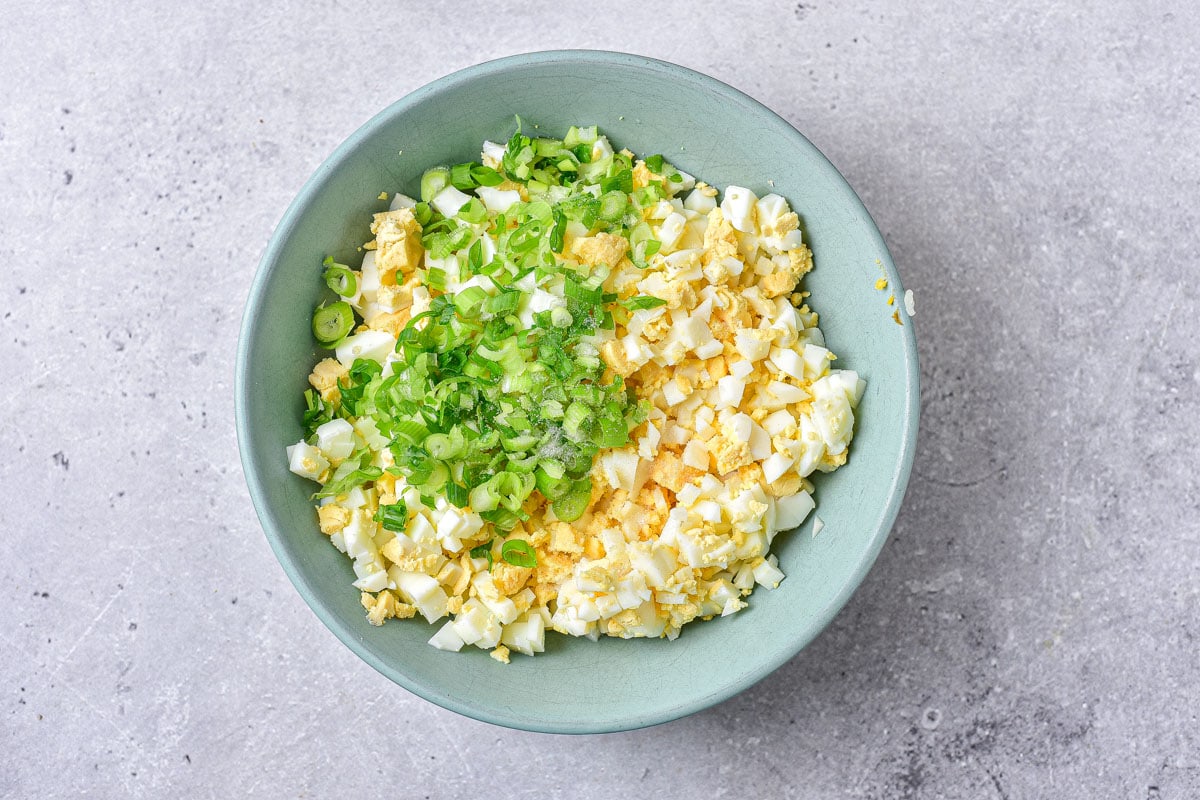
While you wait for the dough to rise, make the fillings – the egg and green onion filling first.
In a small bowl, combine the chopped hard-boiled eggs and green onions. Add a pinch of salt and pepper if desired.
Mix thoroughly. You can also add 1 tablespoon of sour cream or mayonnaise to make the filling creamier (optional).
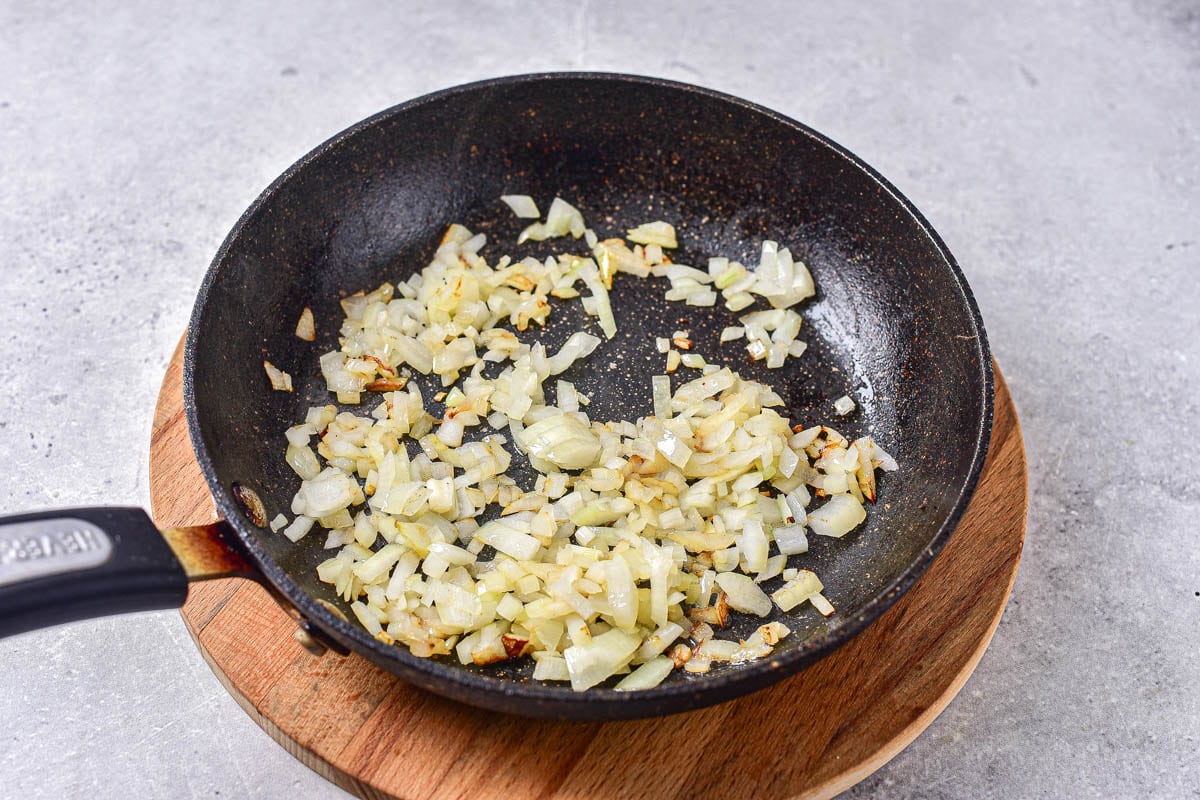
Next, we’ll make the mashed potato filling. In a skillet over medium-high heat, sauté the chopped onion in some vegetable oil for 5-6 minutes, stirring occasionally, until soft and golden.
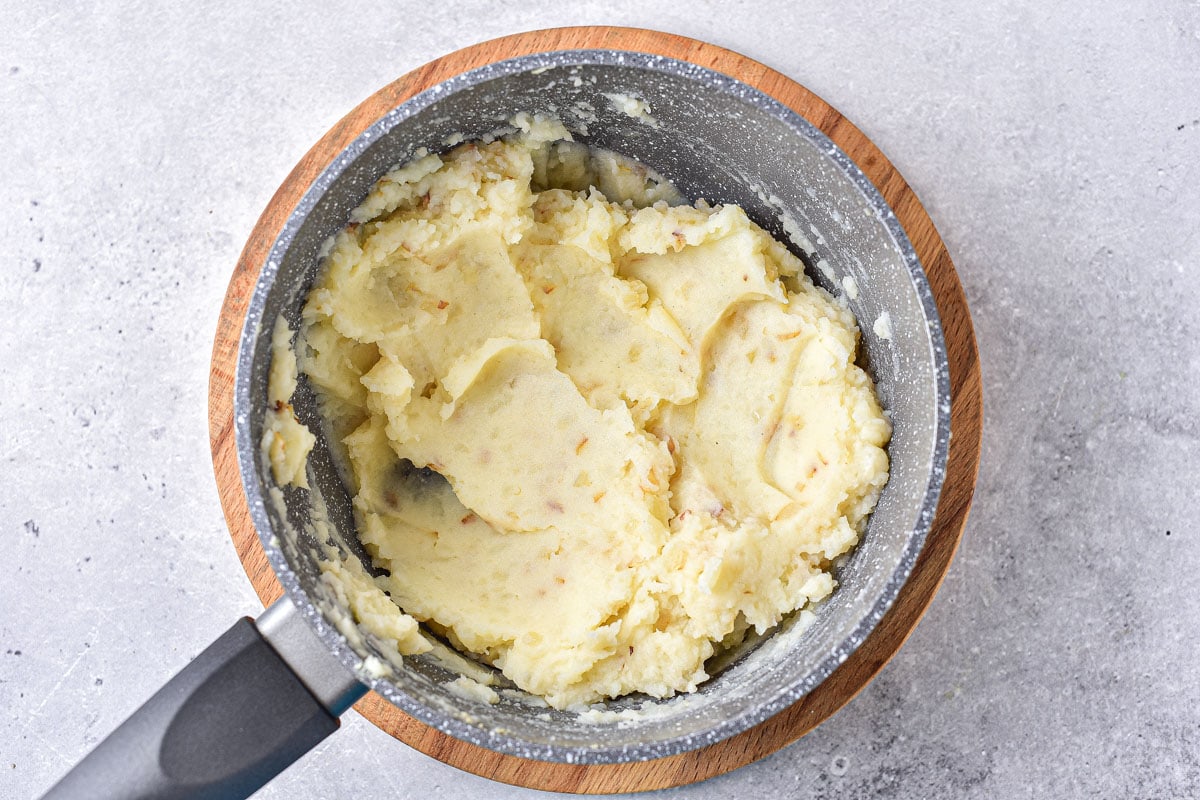
In a bowl or saucepan, mix the mashed potatoes with the fried onions. Add salt and pepper or any other spices to taste.
Once the dough has risen and noticeably increased in size, sprinkle some flour on your work surface.
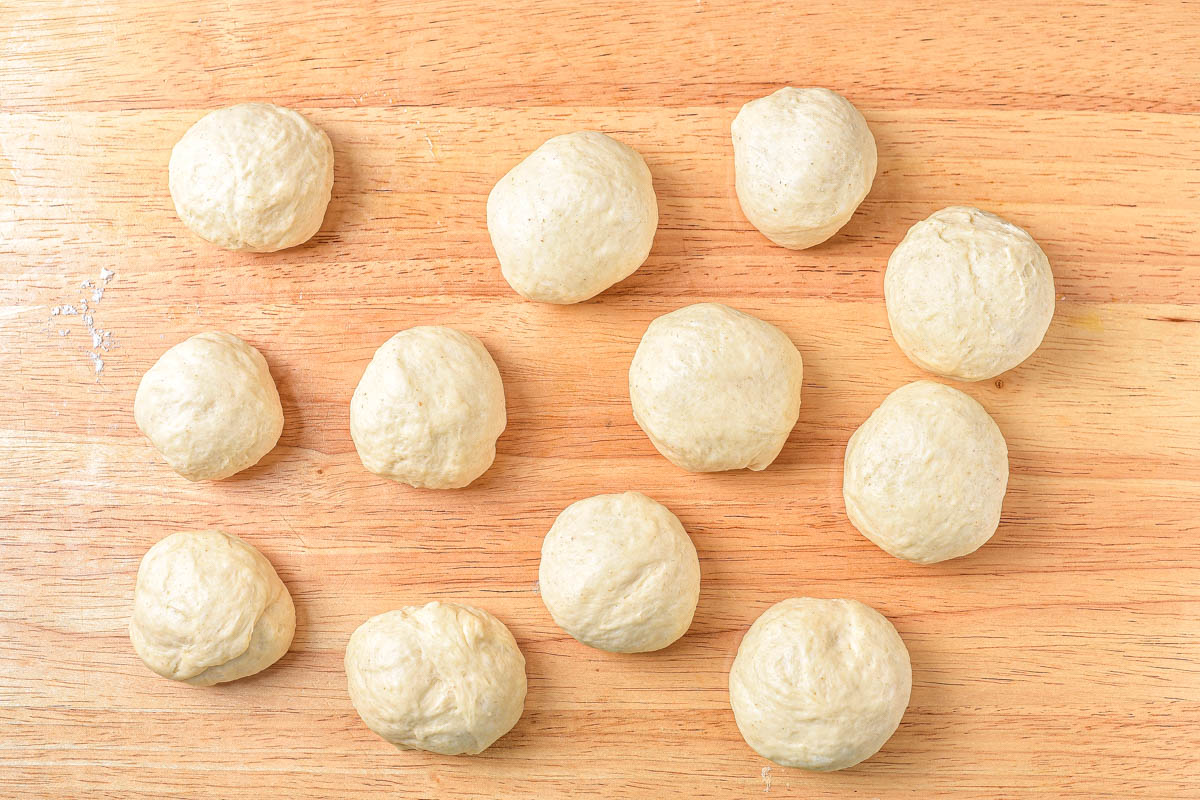
Knead the dough briefly, then divide it into 12-15 equal pieces and shape them into balls.
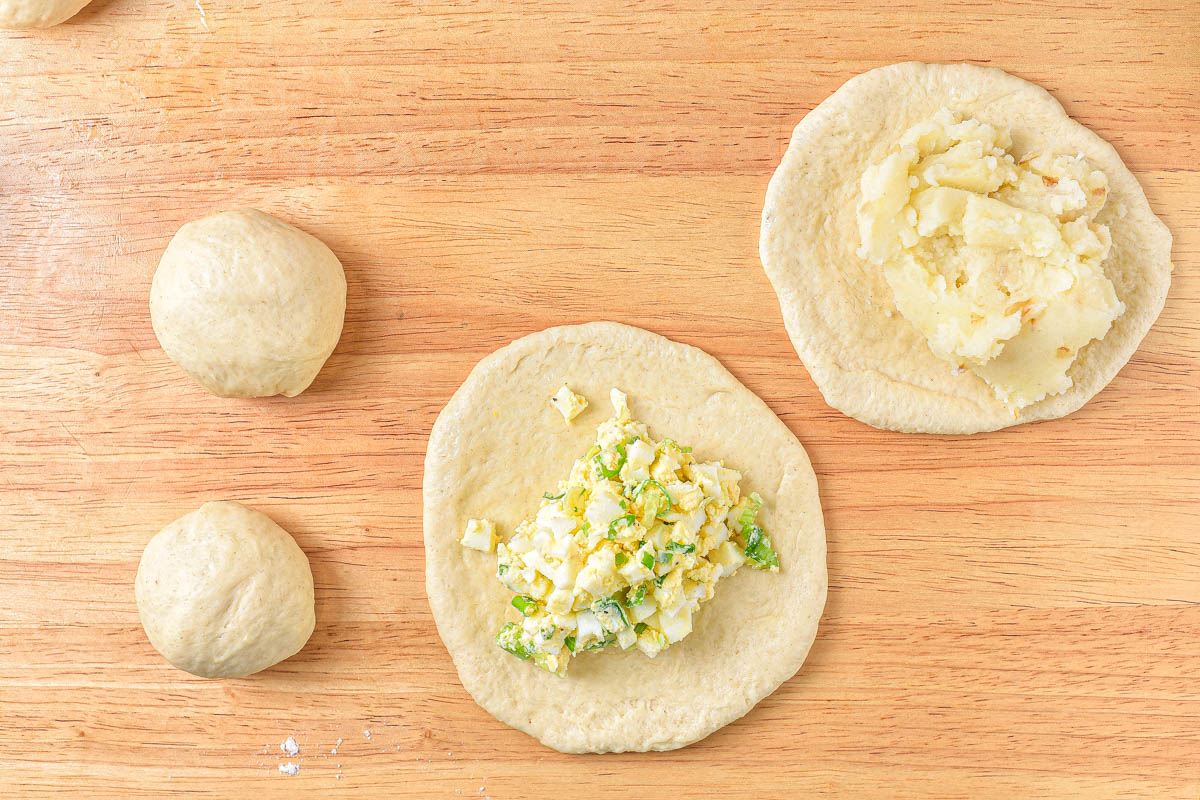
On a lightly floured surface, roll out each ball into a 4-5 inch circle.
Spoon 2-3 tablespoons of the filling onto the center of each circle. Fill some of the pirozhki with the egg and green onion mixture and the rest with the mashed potato filling.

Fold the edges up toward the center and seal by pinching them together. Shape the pies into ovals.
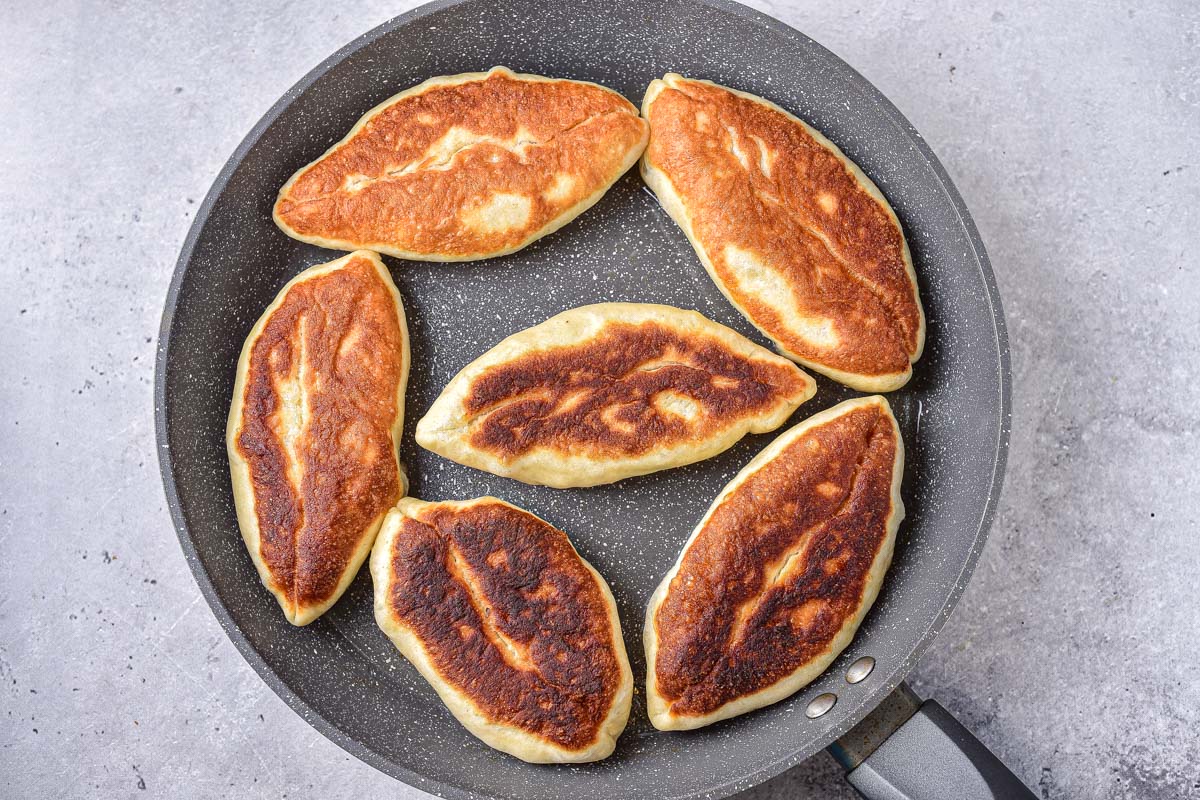
Heat some oil (3-4 tablespoons) in a large frying pan. Carefully place some of the pies in the pan and fry them over low heat for about 5 minutes.
Then flip them over, cover the pan with a lid and cook for another 4 minutes. Add more oil as needed to prevent the pies from sticking or burning. Repeat with the rest of the hand pies.
Alternatively, you can also bake the pirozhki in the oven at 360 degrees Fahrenheit for about 20-25 minutes. To help them brown, brush them with beaten egg before putting them in the oven.
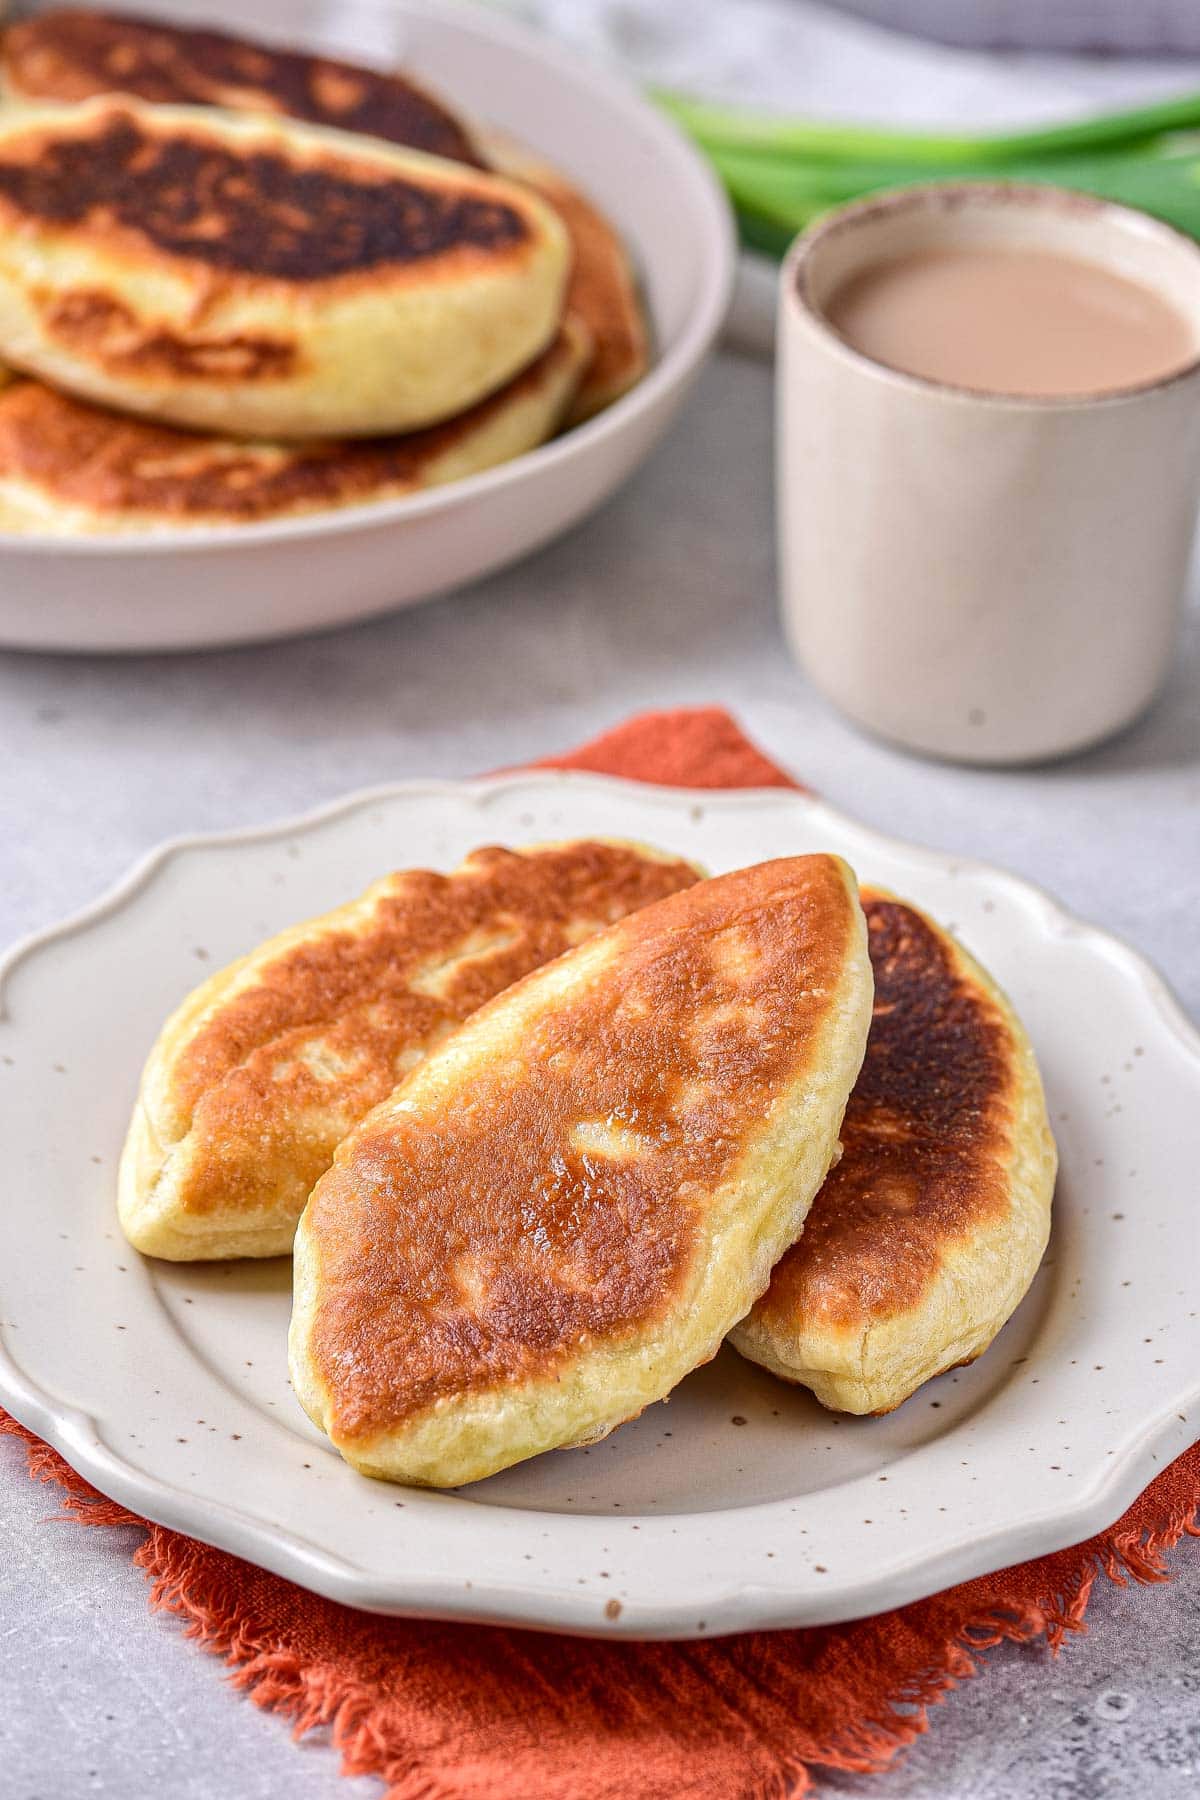
Serve the hand pies hot, with sour cream and milk on the side (optional). Enjoy!
Storage Tips
Pirozhki taste best when they are freshly made and still warm. If you have leftovers, you can store them overnight in a sealed container at room temperature.
If you want to keep them for longer, store them in a sealed container in the fridge for up to 3-4 days.
Alternatively, you can also freeze them for up to 2-3 months. Simply place them in a single layer on a baking sheet and freeze until firm. Then transfer them to a freezer-safe container or freezer bag.
If you are wondering how to heat homemade pirozhki, your best bet is in the oven or air fryer. A lower temperature, such as 300 degrees Fahrenheit, for a few minutes should do the trick.
FAQ
Pirozhki is the Russian name for stuffed crescent-shaped hand pies made from leavened dough. They can be filled with savory or sweet ingredients, such as meat, cabbage, eggs, or jam. The word pirozhki is the diminutive form of the Russian word “pirog”, which is a larger pie.
Piroshki and pierogi are not the same thing. Yes, they both have fillings, but Piroshki are hand pies made from leavened dough which is baked or fried. They are common in Russian and Eastern European cuisines. Pierogi are dumplings filled with various ingredients and made from unleavened dough that is boiled or fried. Pierogi are a staple of Polish and Ukrainian cuisine, where they are known as varenyky.
If you don’t want to make your own dough, any leavened dough will do for pirozhki. So, store-bought pizza dough – depending on its yeast content – might work if you don’t want to make the dough yourself.
You can serve piroshki hot with sour cream and milk on the side. You can also serve them with ketchup, mustard, or any other sauce of your choice. They also go well with soups and salads.
Related Recipes
Here are some other popular Russian recipes to try if you like these pirozhki!
Pirozhki (Russian Hand Pies)
Ingredients
The Dough
- 1 2/3 cups all-purpose flour
- 2 teaspoons dry instant yeast
- 1 tablespoon granulated sugar
- 1/3 teaspoon salt
- 1/3 cup milk, warm
- 1/3 cup water, warm
- 3 tablespoons vegetable oil
Egg and Green Onion Filling
- 3 boiled eggs, peeled and finely chopped
- 3 tablespoons green onion, chopped
- 1 tablespoon sour cream or mayonnaise, optional
- salt, to taste
- black pepper, to taste
Mashed Potato Filling
- 1 tablespoon vegetable oil
- 1 medium yellow onion, chopped
- 2 cups mashed potatoes
- vegetable oil, for frying
Instructions
- In a large bowl, combine the flour, yeast, sugar, and salt.1 2/3 cups all-purpose flour, 2 teaspoons dry instant yeast, 1 tablespoon granulated sugar, 1/3 teaspoon salt
- Add the warm milk and warm water, and 3 tablespoons of vegetable oil.1/3 cup milk, 1/3 cup water, 3 tablespoons vegetable oil
- Mix well with your hands or a mixer with the spiral dough hooks until a soft and slightly sticky dough forms. Cover the bowl with plastic wrap and let the dough rise in a warm place for about an hour, or until doubled in size. Alternatively, you can transfer the dough to a bread maker or multicooker and set it to the bread rising mode for 30-40 minutes.
- In a small bowl, combine the eggs and green onions. Add a pinch of salt and pepper if desired. Mix thoroughly. You can also add 1 tablespoon of sour cream or mayonnaise to make the filling creamier (optional).3 boiled eggs, 3 tablespoons green onion, salt, black pepper, 1 tablespoon sour cream or mayonnaise
- In a skillet over medium-high heat, heat the oil and sauté the chopped onion for 5-6 minutes, stirring occasionally, until soft and golden.1 tablespoon vegetable oil, 1 medium yellow onion
- In a bowl or saucepan, mix the mashed potatoes with the fried onions. Add salt and pepper or any other spices to taste.2 cups mashed potatoes
- Once the dough has risen and noticeably increased in size, sprinkle some flour on your work surface. Knead the dough briefly, then divide it into 12-15 equal pieces and shape them into balls.
- On a lightly floured surface, roll out each ball into a 4-5 inch circle. Spoon 2-3 tablespoons of filling onto the center of each circle. Fill some of the pirozhki with the egg and green onion filling and the rest with the mashed potato filling.
- Fold the edges up toward the center and seal by pinching them together. Shape the pies into ovals.
- Heat some oil (3-4 tablespoons) in a large frying pan. Carefully place some of the pies in the pan and cook over low heat for about 5 minutes. Then flip them over, cover the pan with a lid and cook for another 4 minutes. Add more oil as needed to keep the pies from sticking or burning. Repeat with the rest of the hand pies.vegetable oil
- Serve the pies hot, with sour cream and milk on the side (optional). Enjoy!
Notes
- Be careful not to use too much flour, or the dough might become too dense and the pies will be hard, especially when they cool down. Measure your flour correctly by using the spoon and sweep method.
- Since you are working with yeast, it’s important that the milk and water are warm, but not hot. This could harm the yeast.
- Roll out the dough thinly for the best hand pies.
- You can fill the pies with different fillings, such as stewed cabbage, ground meat, rice and mushrooms, or sweet ones like jam, apples, cottage cheese, or cherries.
- Seal the pirozhki well to prevent the filling from leaking during cooking. If pinching the dough is not enough, you can use some beaten egg or milk to seal the edges.
- Instead of pan-frying, you can bake the pies in the oven at 360 degrees Fahrenheit for 20-25 minutes. To help them brown, brush them with beaten egg before placing them in the oven.
- The exact cooking or baking time may vary depending on the filling and the size of the pirozhki.
Nutrition
This nutritional information has been estimated by an online nutrition calculator. It should only be seen as a rough calculation and not a replacement for professional dietary advice.
