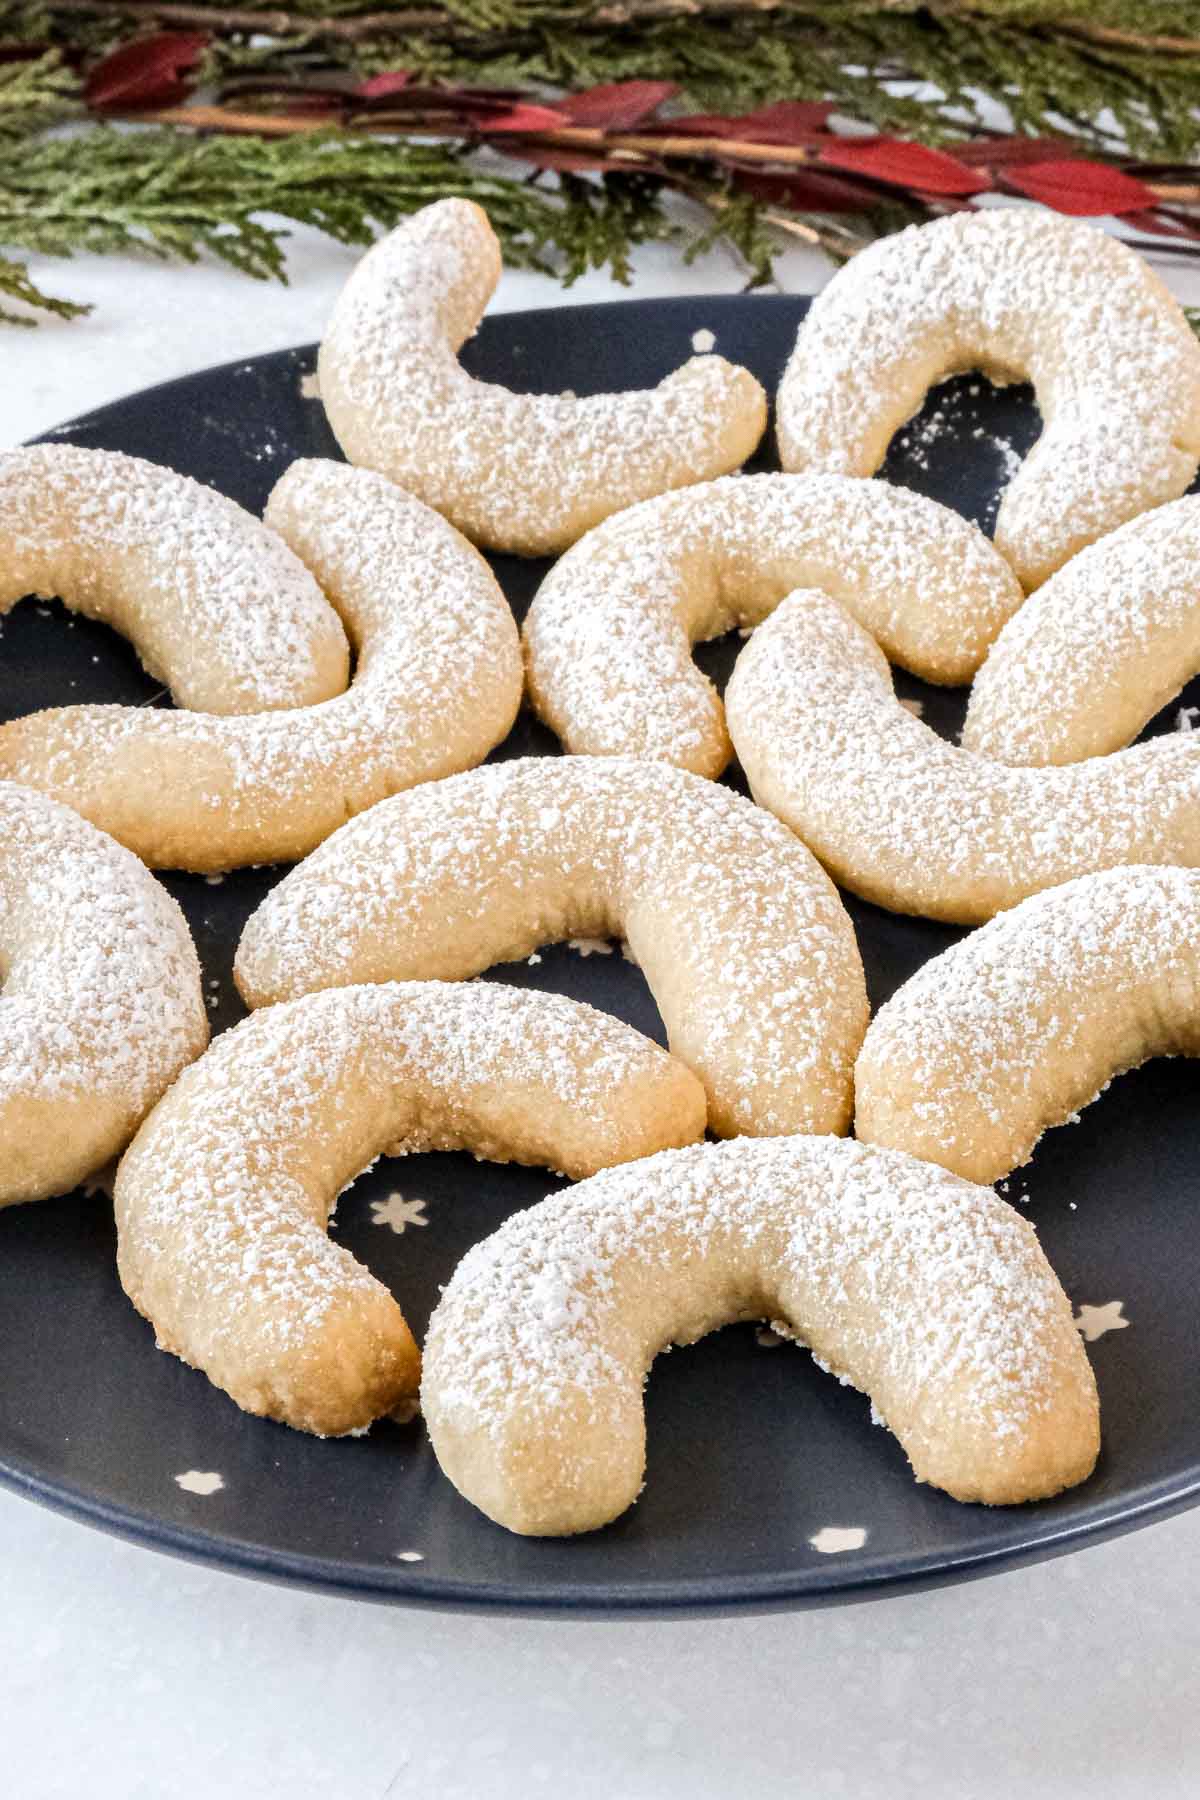
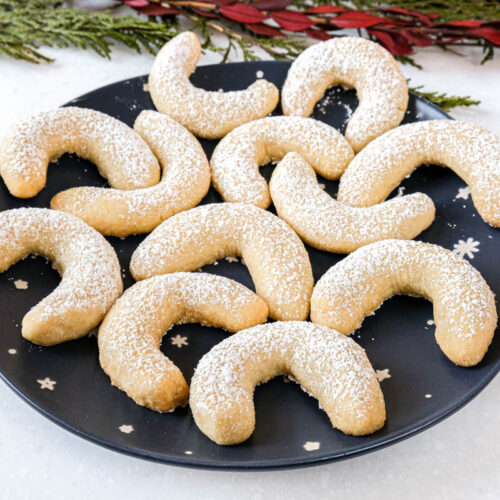
Here’s A Vanilla Crescent Cookies Recipe For Delicious Christmas Cookies!
Want to make delicious vanilla crescent cookies for the upcoming holiday season? We’ve got a Vanillekipferl recipe in English just for you!
Originally from Austria, these buttery, crumbly, and wonderfully sweet crescent cookies with powdered sugar are also popular in Germany and parts of Eastern Europe, such as Hungary.
Ingredients
Here are the vanilla crescent cookie ingredients that you will need for his recipe. It’s pretty easy – and you’ll certainly need quite a bit of butter!
- Butter – Cold unsalted butter. Use good-quality butter for the best flavor.
- All-purpose flour – To make the cookie dough.
- Ground almonds – To add a nutty flavor and texture. You can also use almond flour.
- Granulated sugar – To sweeten the vanilla crescent cookies.
- Vanilla extract – Or one package of vanilla sugar if you can find it.
- Egg yolk – Helps bind the dough.
- Powdered sugar – For dusting the cookies once they are baked.
Recipe Tips and Substitutions
Before making this Vanillekipferl recipe, have a read through these recipe tips and substitutions so that you know exactly what to expect!
- It’s important that the butter you use is cold. Otherwise, it’s more likely that the dough will fall apart. Using butter from the fridge works well.
- Make sure to measure the flour correctly using the spoon and sweep method.
- We add an egg yolk to act as a binding agent. Originally, vanilla crescent cookies were made without eggs but the egg version is completely acceptable. If you’re up for a challenge, you can skip the egg yolk (make sure the other ingredients are cold!) – but don’t be surprised if your dough falls apart.
- We use ground almonds which is arguably the most popular choice nowadays, but you can use ground walnuts or ground hazelnuts if you prefer.
- Avoid over-kneading the dough as this can warm up the butter too much and make the dough overly crumbly.
- While you’re shaping the cookies, keep the parts of the dough that you’re not using in the fridge.
- Have one baking sheet in the oven at a time, otherwise, the cookies may bake unevenly.
- Don’t overbake the cookies. They are done when the bottom/sides are starting to get golden brown. The top doesn’t need to be golden.
How to Make Vanillekipferl – Step by Step Instructions
If you’re a little unsure about how to make Vanillekipferl crescent cookies, you can follow along with the recipe process photos in this section to see how we make them.
In case you’re feeling confident and don’t like visuals, you can scroll down to the detailed recipe card at the bottom of this post!
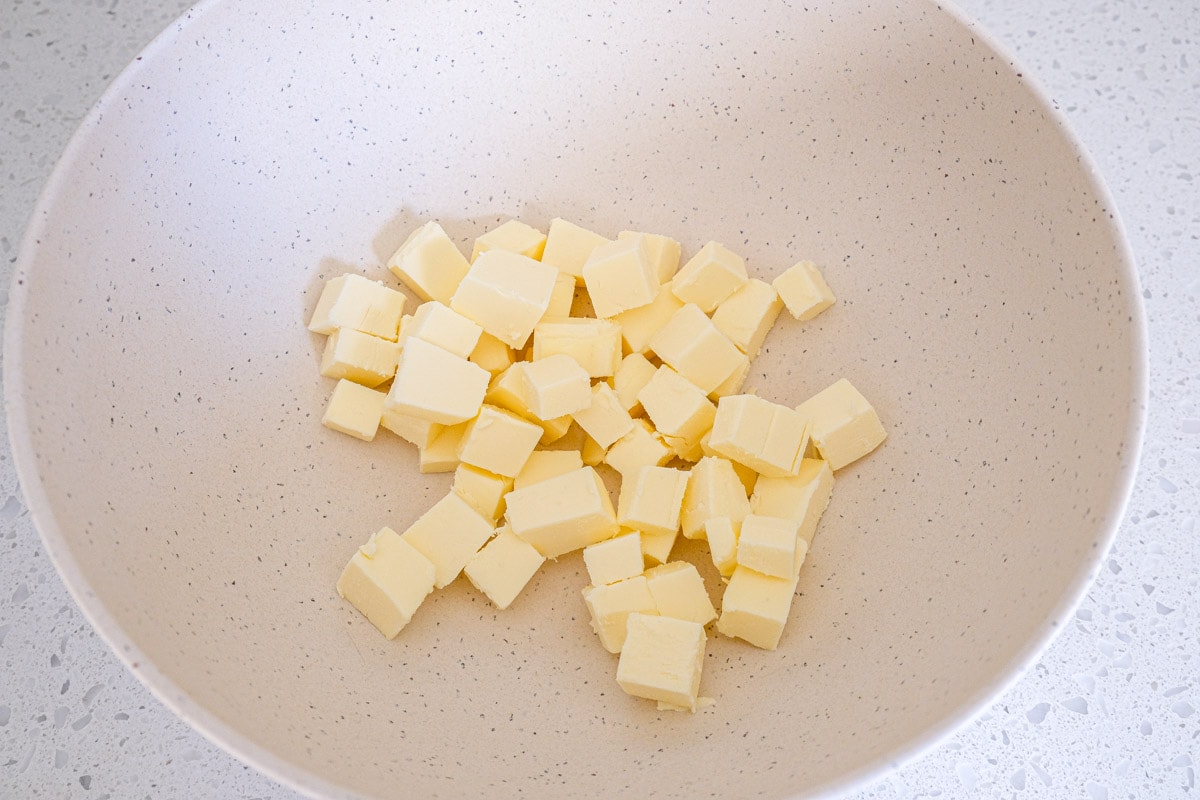
Start by cutting the cold butter into small pieces and place them into a mixing bowl.
Be sure to move kind of quickly when you cut the butter because it should stay cold.
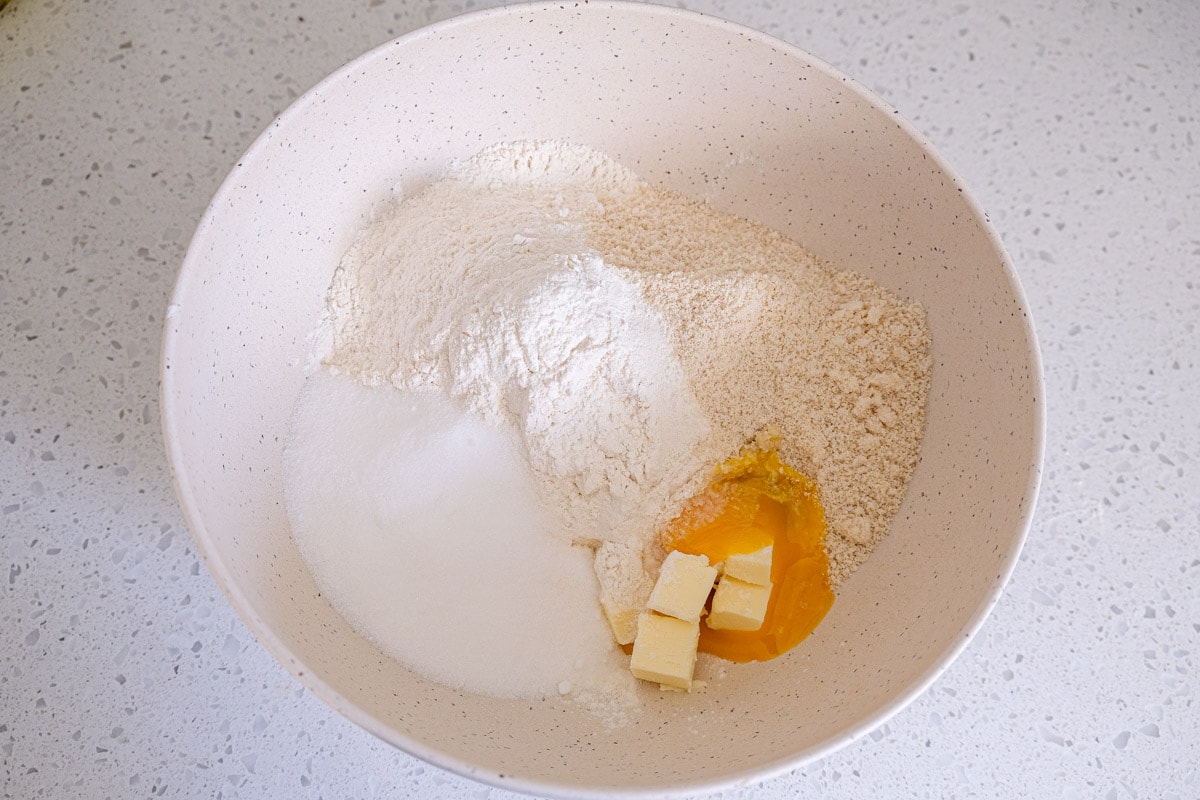
To the medium-sized bowl, add the flour, ground almonds, sugar, vanilla extract and egg yolk.
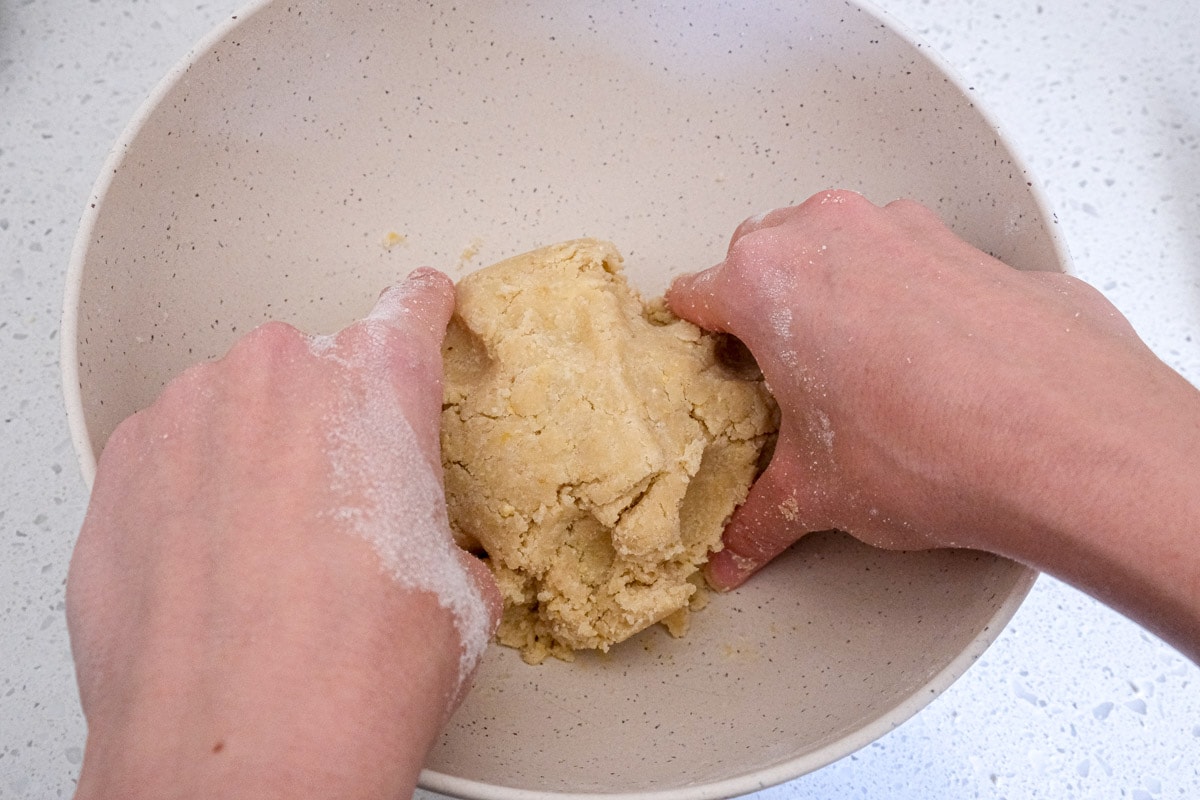
Mix everything together using your clean hands or a pastry cutter. Use your hands towards the end and press the dough together until it forms a ball – then stop.
Don’t over-knead the dough as this can warm up the butter too much and make it overly crumbly.
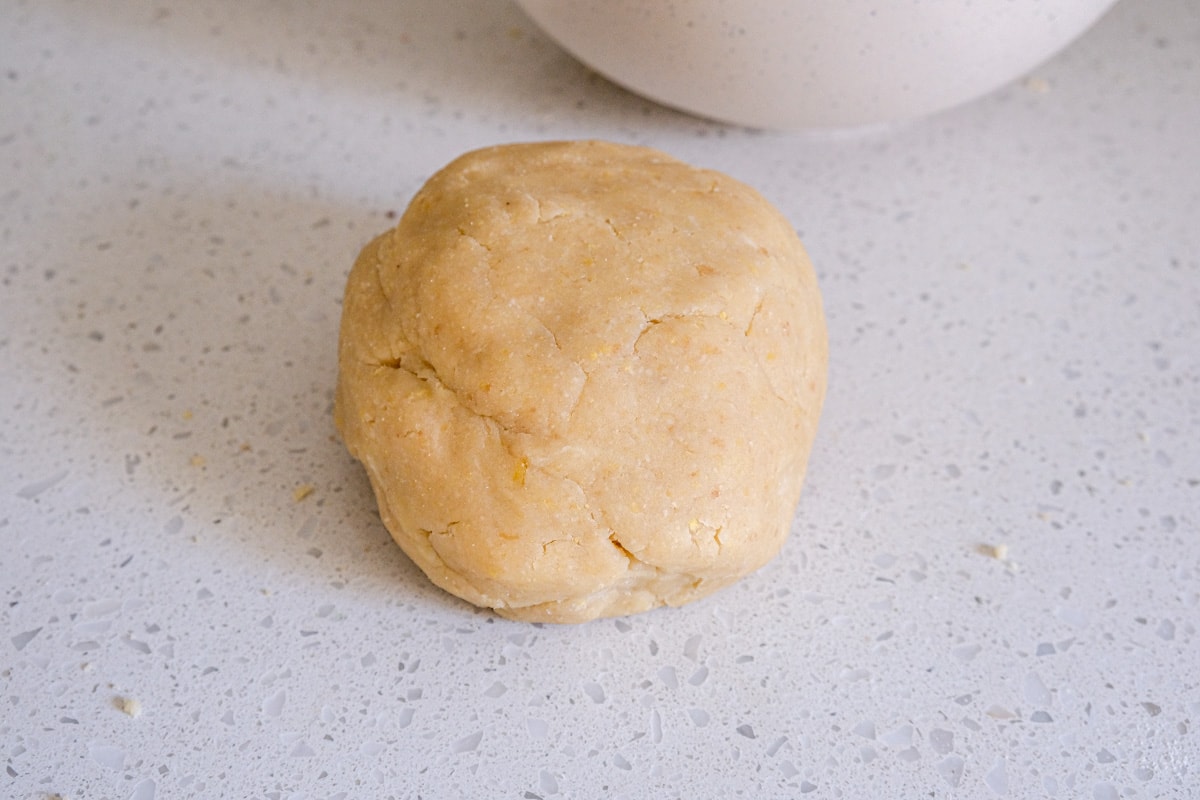
Wrap the dough in cling film (or put it into a plastic bag) and place it in the fridge for one hour. You can also keep it in the fridge for longer but it should at least be one hour.
Once the hour is up, preheat the oven to 350 degrees Fahrenheit and put parchment paper on your baking sheet.
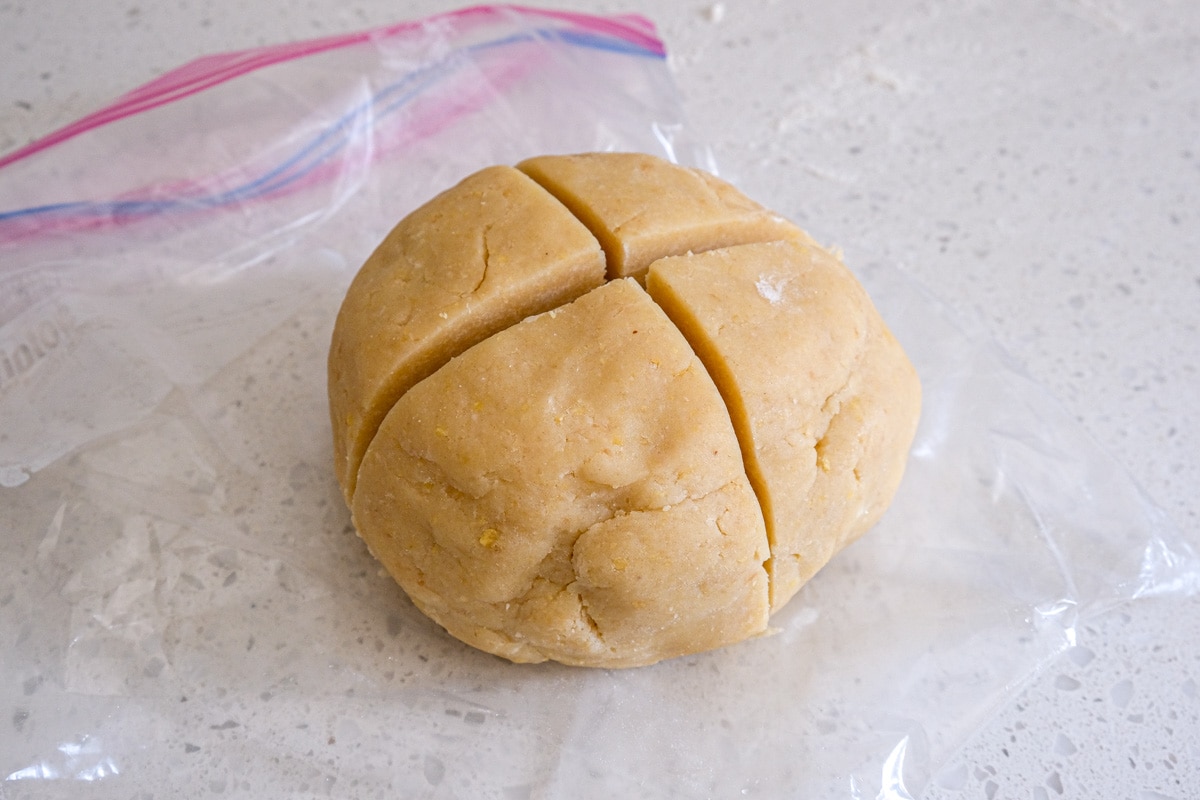
Place a small amount of flour on the counter and cut the dough into four pieces of equal size. Keep a quarter of the dough out, and place the rest back into the fridge.
It’s important that the rest of the dough stays chilled.
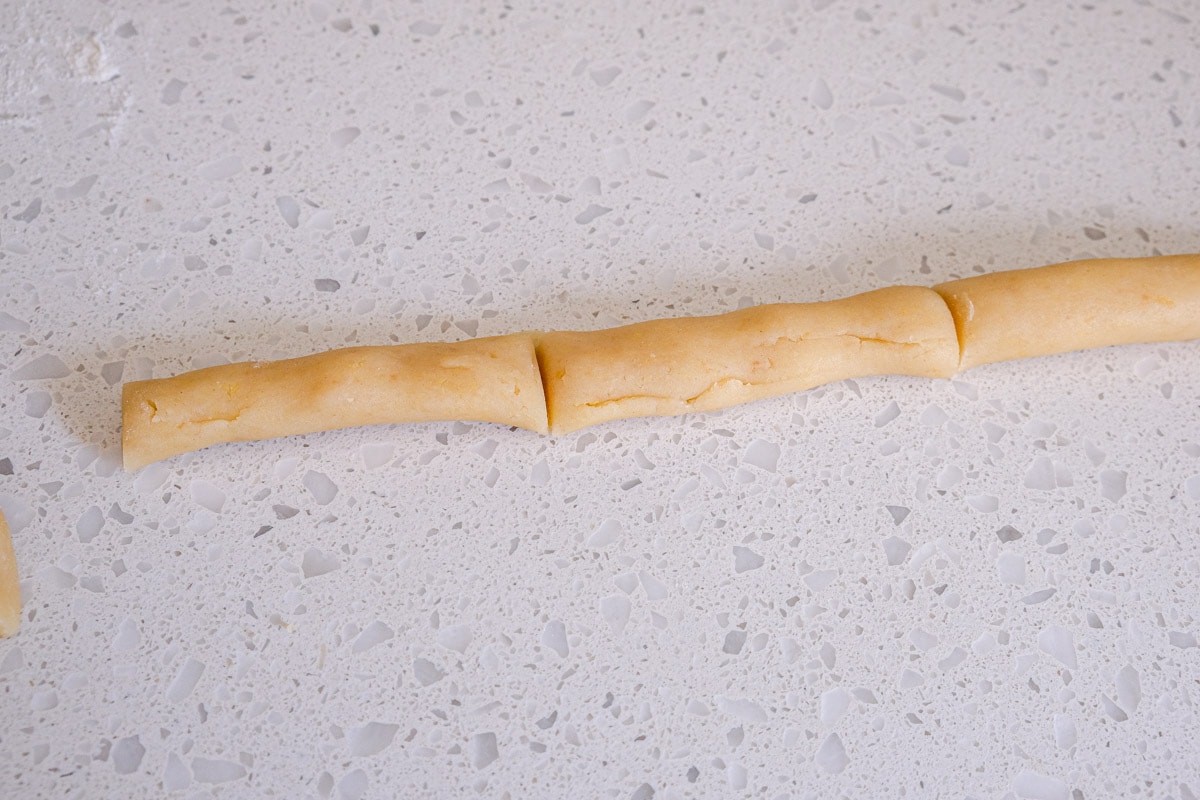
Briefly knead the dough, then roll it out with your hands until it becomes a long “sausage” with a thickness of approximately 1/2 inch.
It might fall apart a little bit. In that case, simply knead the dough a little bit more, then press it together and roll it out again – but be quick since you don’t want the butter to get too warm.
Cut the dough into roughly 3-inch long pieces.
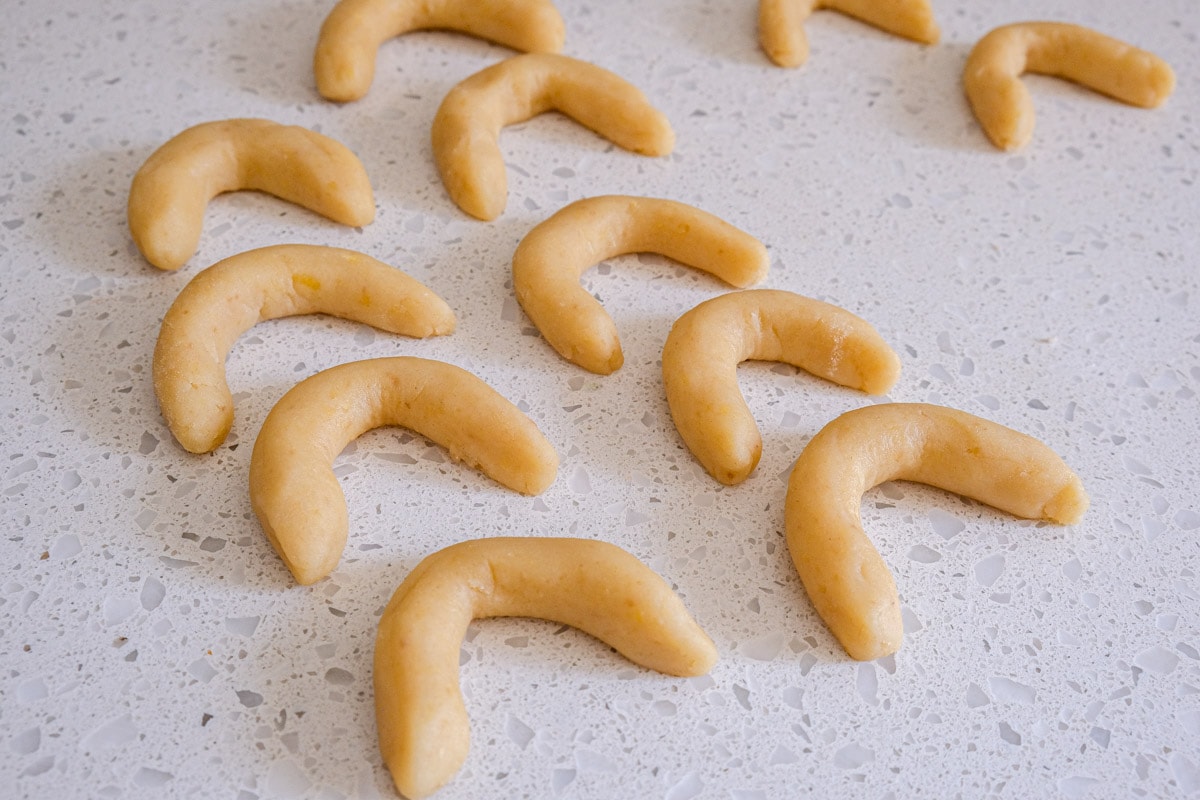
Now shape the pieces of dough so they look like crescents. Make sure to slightly pinch the ends for a nicer look.
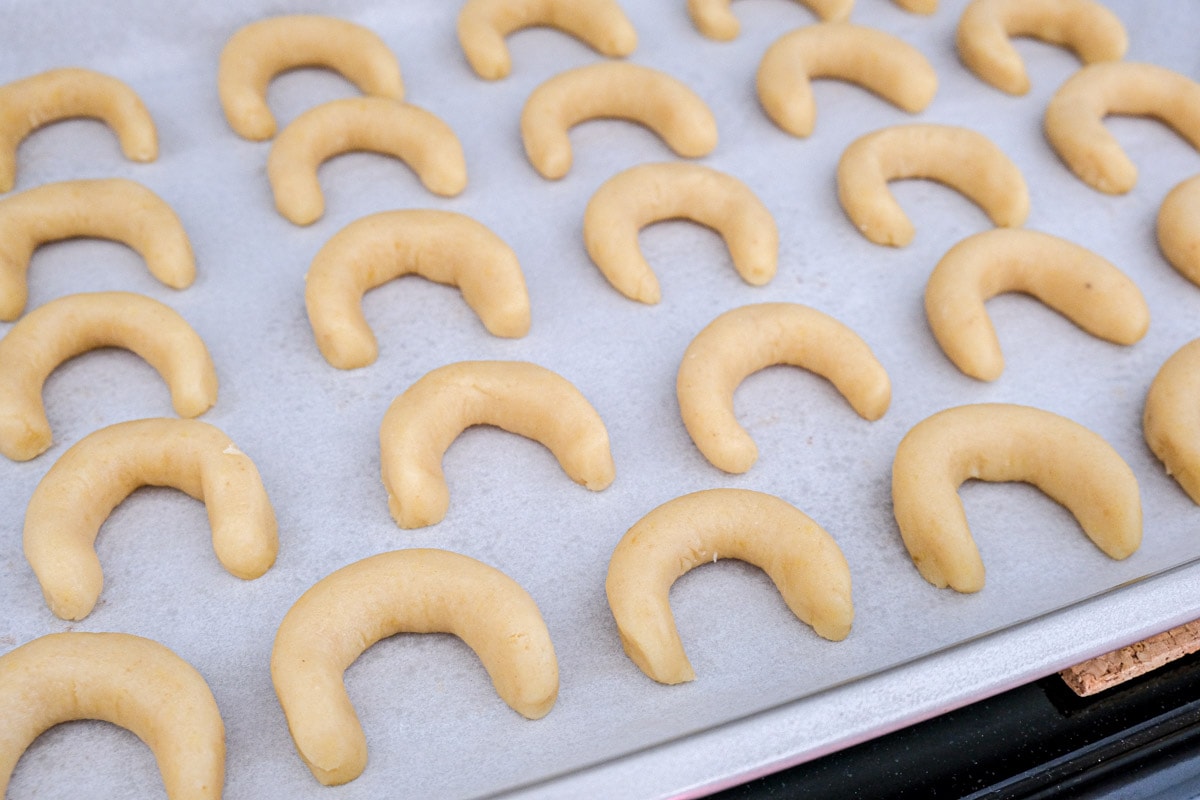
Place the half-moon cookies on a baking sheet.
Now take the second piece of dough out of the fridge, briefly knead it, then roll it out, cut it, and shape the crescent cookies.
Repeat these steps until you have used up all the dough. You’ll likely need to use at least two baking sheets.
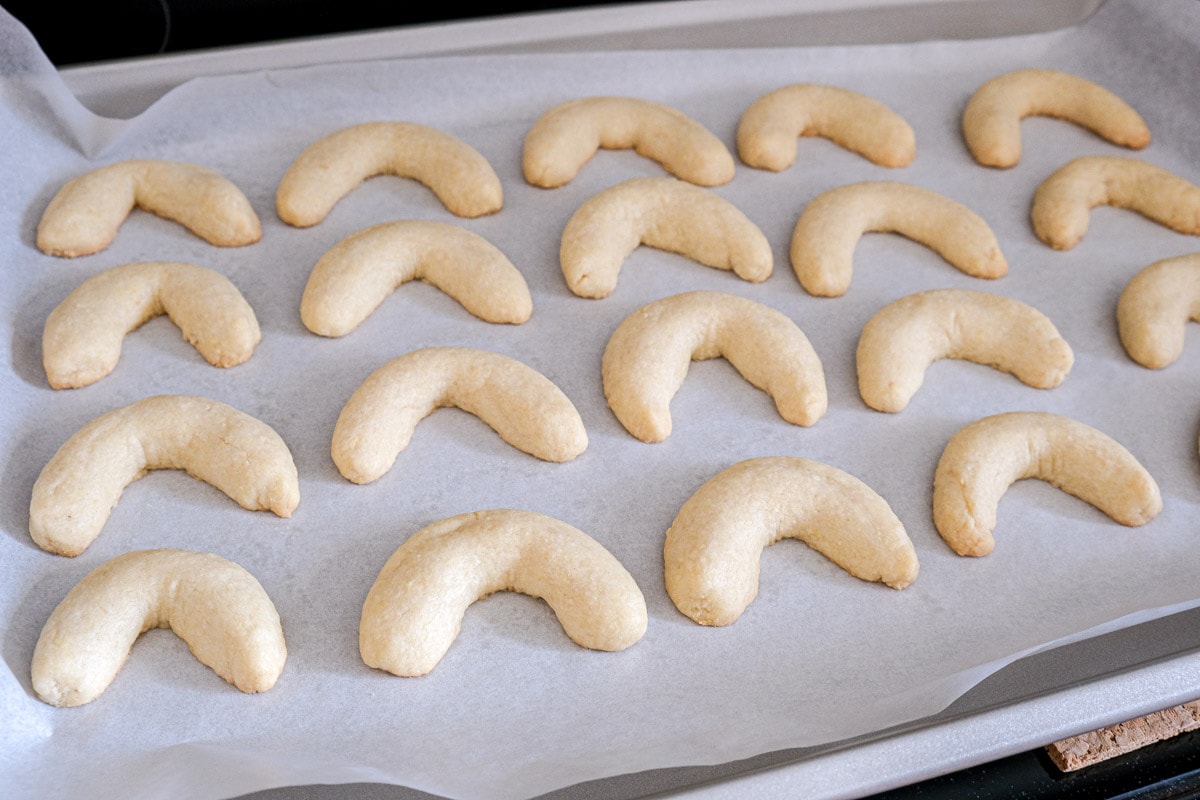
Bake the cookies for approximately 15-17 minutes on the middle rack of the oven until the edges are just starting to get lightly golden brown.
Remember: The tops of the cookies don’t need to be brown.
Since every oven is different, your baking time might vary slightly. Also, if you made your cookies thicker than approximately 1/2 inch, they might need a bit longer.
We recommend only having one baking sheet in the oven at a time. The cookies might cook unevenly if you have two baking sheets in the oven at the same time.
When the cookies are done, take them out of the oven and lift the parchment paper with the cookies from the baking sheet.
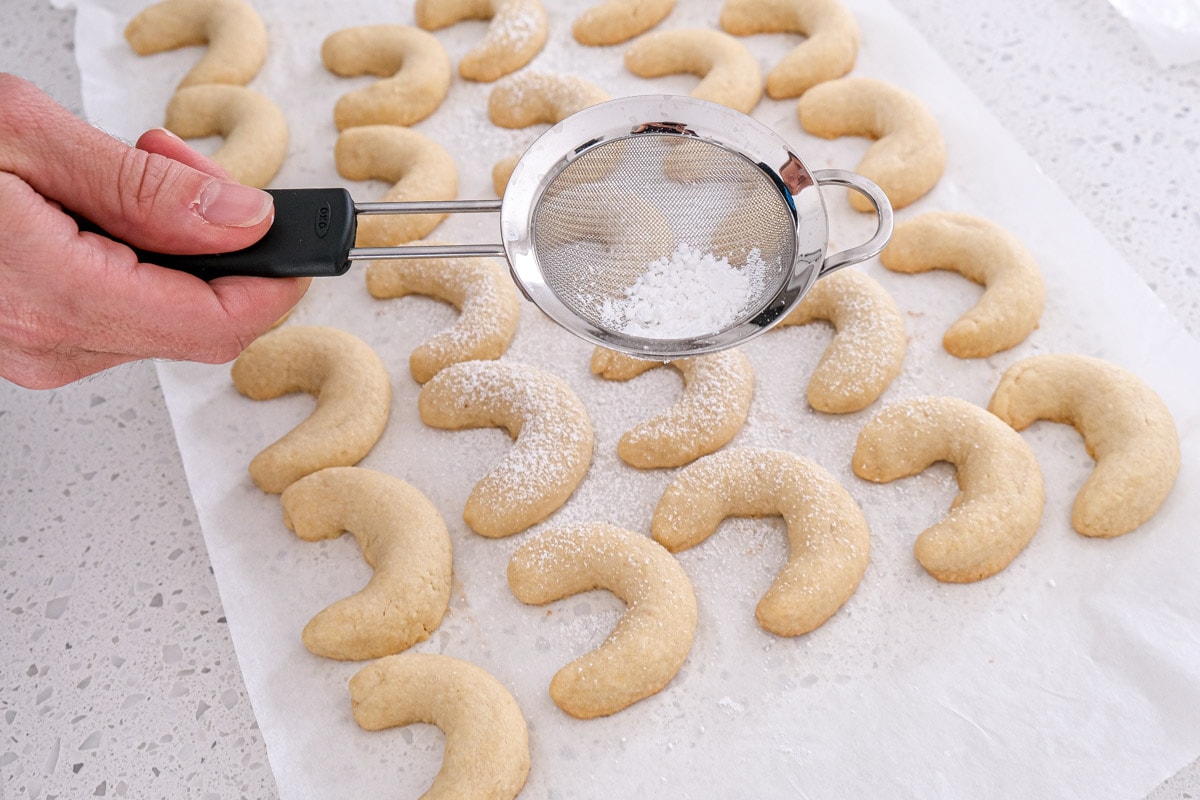
Right away carefully move the cookies toward the center of the parchment paper and dust them in powdered sugar.
Alternatively, you can also roll them in powdered sugar, but the cookies are more likely to break if you do that.
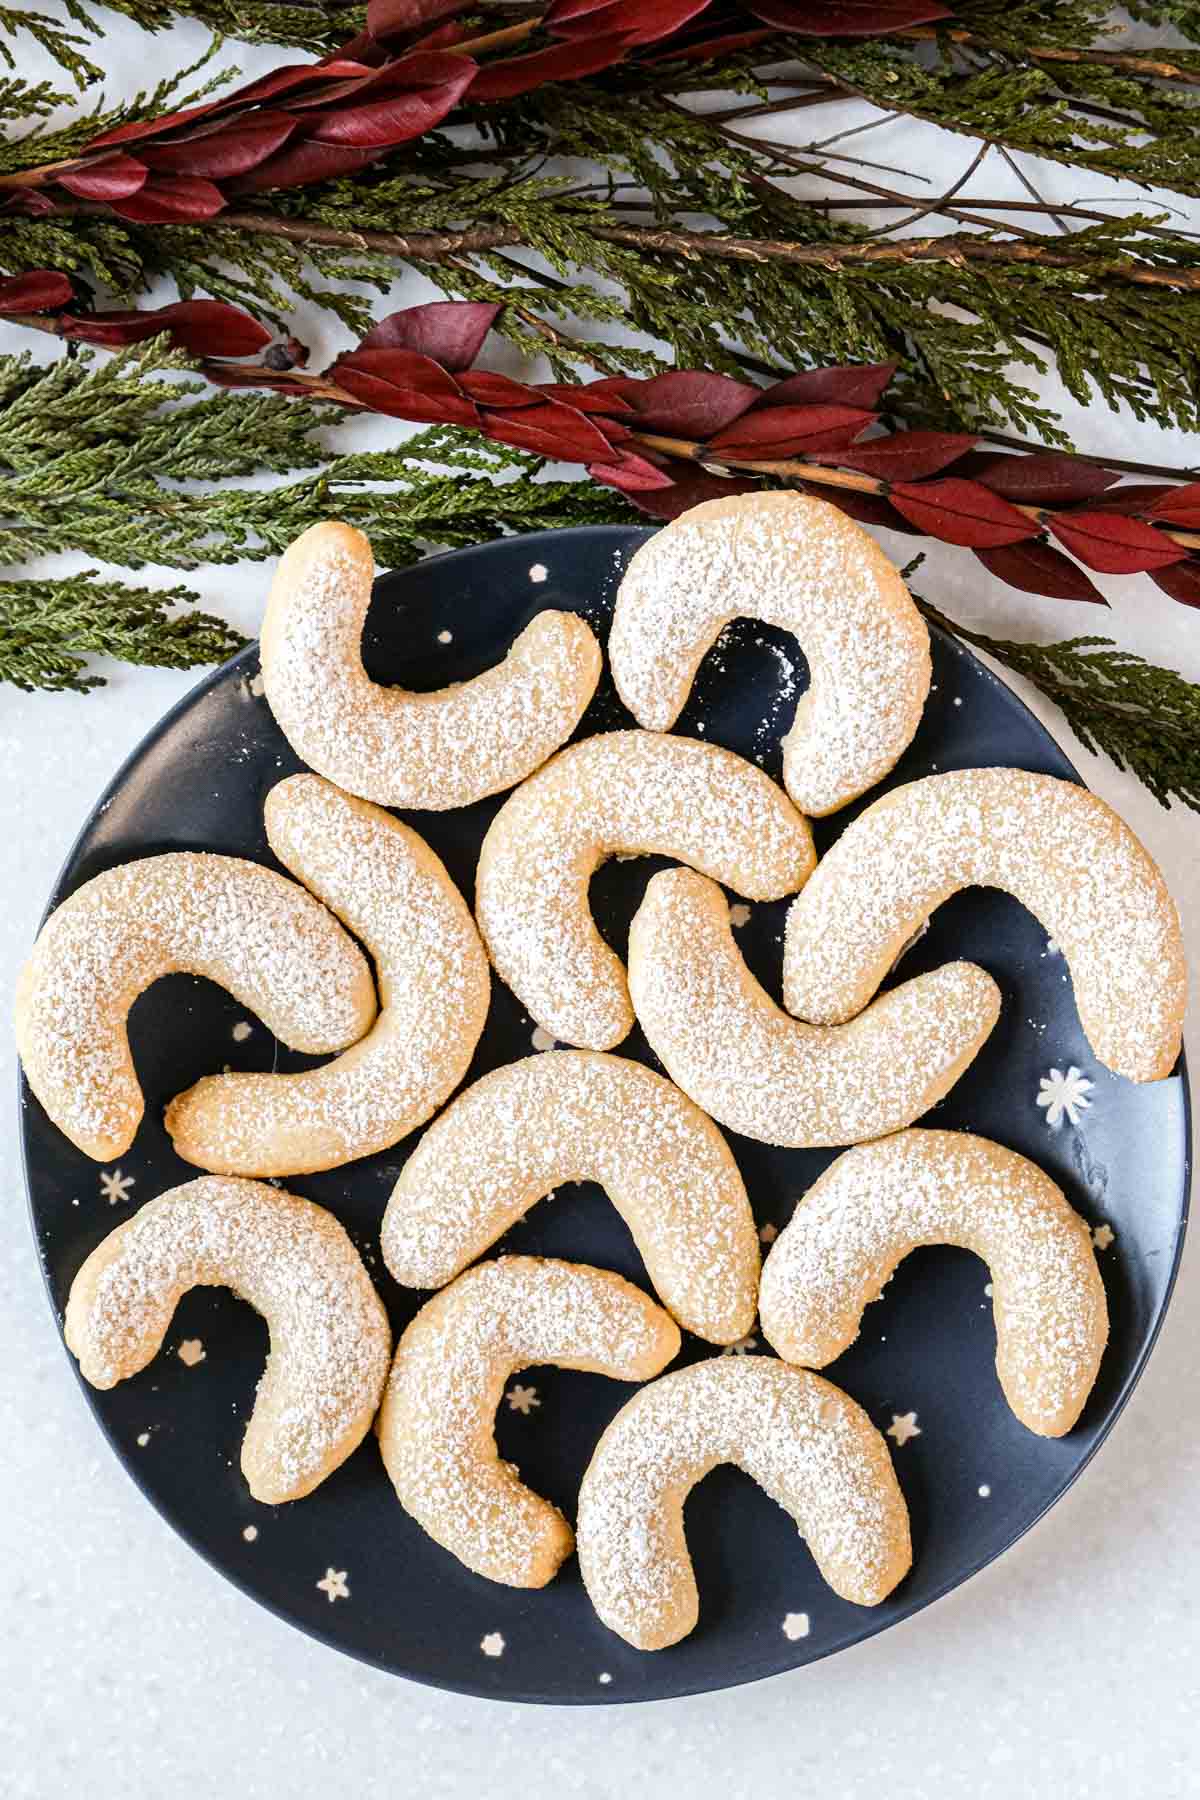
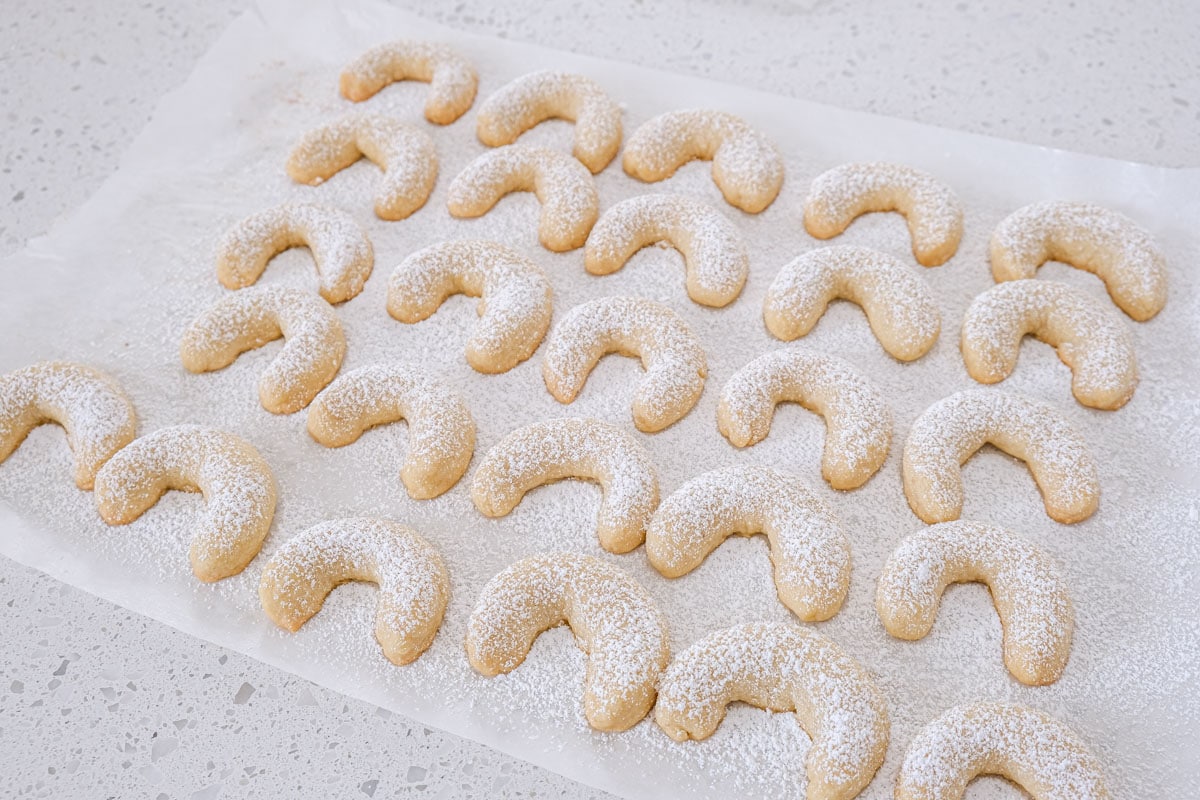
You can always sprinkle more powdered sugar on them when they are cooled off for taste and design. Enjoy!
Storage Tips
Once your Vanillekipferl have cooled, you can store them in a cookie tin in a cool and dry place (e.g. a cold bedroom, the garage, or basement).
You can place some parchment paper between layers if you prefer.
Properly stored, they’ll stay fresh for around four weeks (but they probably won’t last that long anyway because they are delicious).
This means you can whip up a large batch of vanilla crescent cookies and store them or send them to family and friends after bake day!
FAQ
Vanillekipferl is German for “vanilla crescent cookies”. These buttery cookies are shaped in a crescent, heavily dusted in powdered sugar, and popular around Christmas. “Kipferl” in German and “Kifli” in Hungarian means “crescent”.
Of Austrian origin, these cookies are said to originate in Vienna. The crescent shape is said to represent the Turkish crescent moon (from the days of the Ottoman Empire). The cookies exist to celebrate the Austro-Hungarian (and Polish) win over the Ottomans in the Battle of Vienna in 1683.
You would pronounce the German word “Vanillekipferl” like “Van-illeh-kip-fair-ell”.
Originally from Austria, these cookies are also very popular Christmas cookies in Germany and Switzerland. You can also find similar variations across parts of Eastern Europe like Czechia (Vanilkové rohlíčky), Hungary (Mandulás kifli), Slovakia and Poland. These cookies were originally made with ground walnuts but some Vanillekipferl recipes (like ours) use almond or even hazelnut as the nut-base.
As much or as little as you like. We dust with a good amount but some vanilla crescent cookies are heavily coated in powdered sugar. It’s really up to personal preference.
Related Recipes
Looking for other popular European holiday treats? Try out these classic German cookies and sweet treats from around the DACH region!
- German Gingerbread Cookies (Lebkuchen)
- Zimtsterne (German Cinnamon Stars)
- Coconut Macaroons
- Linzer Cookies
- German Spritz Cookies (Spritzgeback)
- Pfeffernüsse (German Spice Cookies)
Vanillekipferl (Vanilla Crescent Cookies)
Ingredients
- 1 cup butter, cold
- 2 cups all-purpose flour
- 3/4 cup ground almonds
- 1/3 cup granulated sugar
- 1 teaspoon vanilla extract
- 1 egg yolk
- powdered sugar, for dusting
Instructions
- Cut the cold butter into small pieces.
- In a medium-sized bowl, combine the flour, butter, ground almonds, sugar, vanilla extract, and egg yolk. Use your clean hands or a pastry cutter to mix the ingredients. Use your hands towards the end and press the dough together until it forms a ball. Don't over-knead.
- Wrap the dough in cling film (or put it into a plastic bag) and refrigerate it for at least one hour.
- Once the hour is up, preheat the oven to 350 degrees Fahrenheit and line one to two baking sheets with parchment paper.
- Lightly flour your work surface and divide the dough into four equal portions. Take one portion out and return the rest to the refrigerator. You should only take out a small amount of dough at a time and let the rest stay cold.
- Knead the dough briefly, then roll it with your hands into a long "sausage" about 1/2 inch thick. If the dough falls apart, briefly knead it again and roll it out again.
- Cut the dough into roughly 3-inch long pieces and shape them into crescents. Slightly pinch the ends for a nicer look. Place the cookies on the prepared baking sheet. Repeat with the remaining dough. You'll likely need to use at least two baking sheets.
- Bake the cookies for approximately 15-17 minutes on the middle rack of the oven, or until the edges are just starting to get lightly golden brown. Since every oven is different, your baking time might vary slightly.
- Remove the cookies from the oven and lift the parchment paper with the cookies from the baking sheet. Right away carefully move the cookies towards the center of the parchment paper and dust them in powdered sugar. Alternatively, you can roll them in powdered sugar, but the cookies are more likely to break. Enjoy!
Notes
- It’s important that the butter you use is cold. Otherwise, it’s more likely that the dough will fall apart.
- Make sure to measure the flour correctly using the spoon and sweep method.
- Some traditional vanilla crescent cookies are made without egg. This can make it more difficult to work with the dough. If you choose to omit the egg yolk, make sure the other ingredients are cold.
- We use ground almonds, but you can use ground walnuts or ground hazelnuts if you prefer.
- While you’re shaping the cookies, keep the parts of the dough that you’re not using in the fridge.
- The cookies should be about the same size and thickness or they may bake unevenly.
- Only have one baking sheet in the oven at a time, otherwise, the cookies may bake unevenly.
- Don’t overbake the cookies (they don’t need to be golden brown all around!) as this will make them too hard.
- You can store the cooled cookies in a cookie tin in a cool and dry place for up to 4 weeks.
Nutrition
This nutritional information has been estimated by an online nutrition calculator. It should only be seen as a rough calculation and not a replacement for professional dietary advice.

Excellent cookies. I have made these before but your instructions are very good. I rechill the cookies after making the crescents and they bake up perfectly.
Skulle gärna få receptet med gram eller dl Vet ej vad 2 koppar motsvarar i mjölmängd
Thanks for your comment, Ewa! We’ll try to provide more recipes in grams/dl in the future. /Lisa